header picture

header picture
Showing posts with label shawl. Show all posts

Monday, November 19, 2018

Three Projects in Three Stages

This month I am going to talk about three projects that I have been working on recently: one just finished, one that I am right in the middle of, and one just starting.

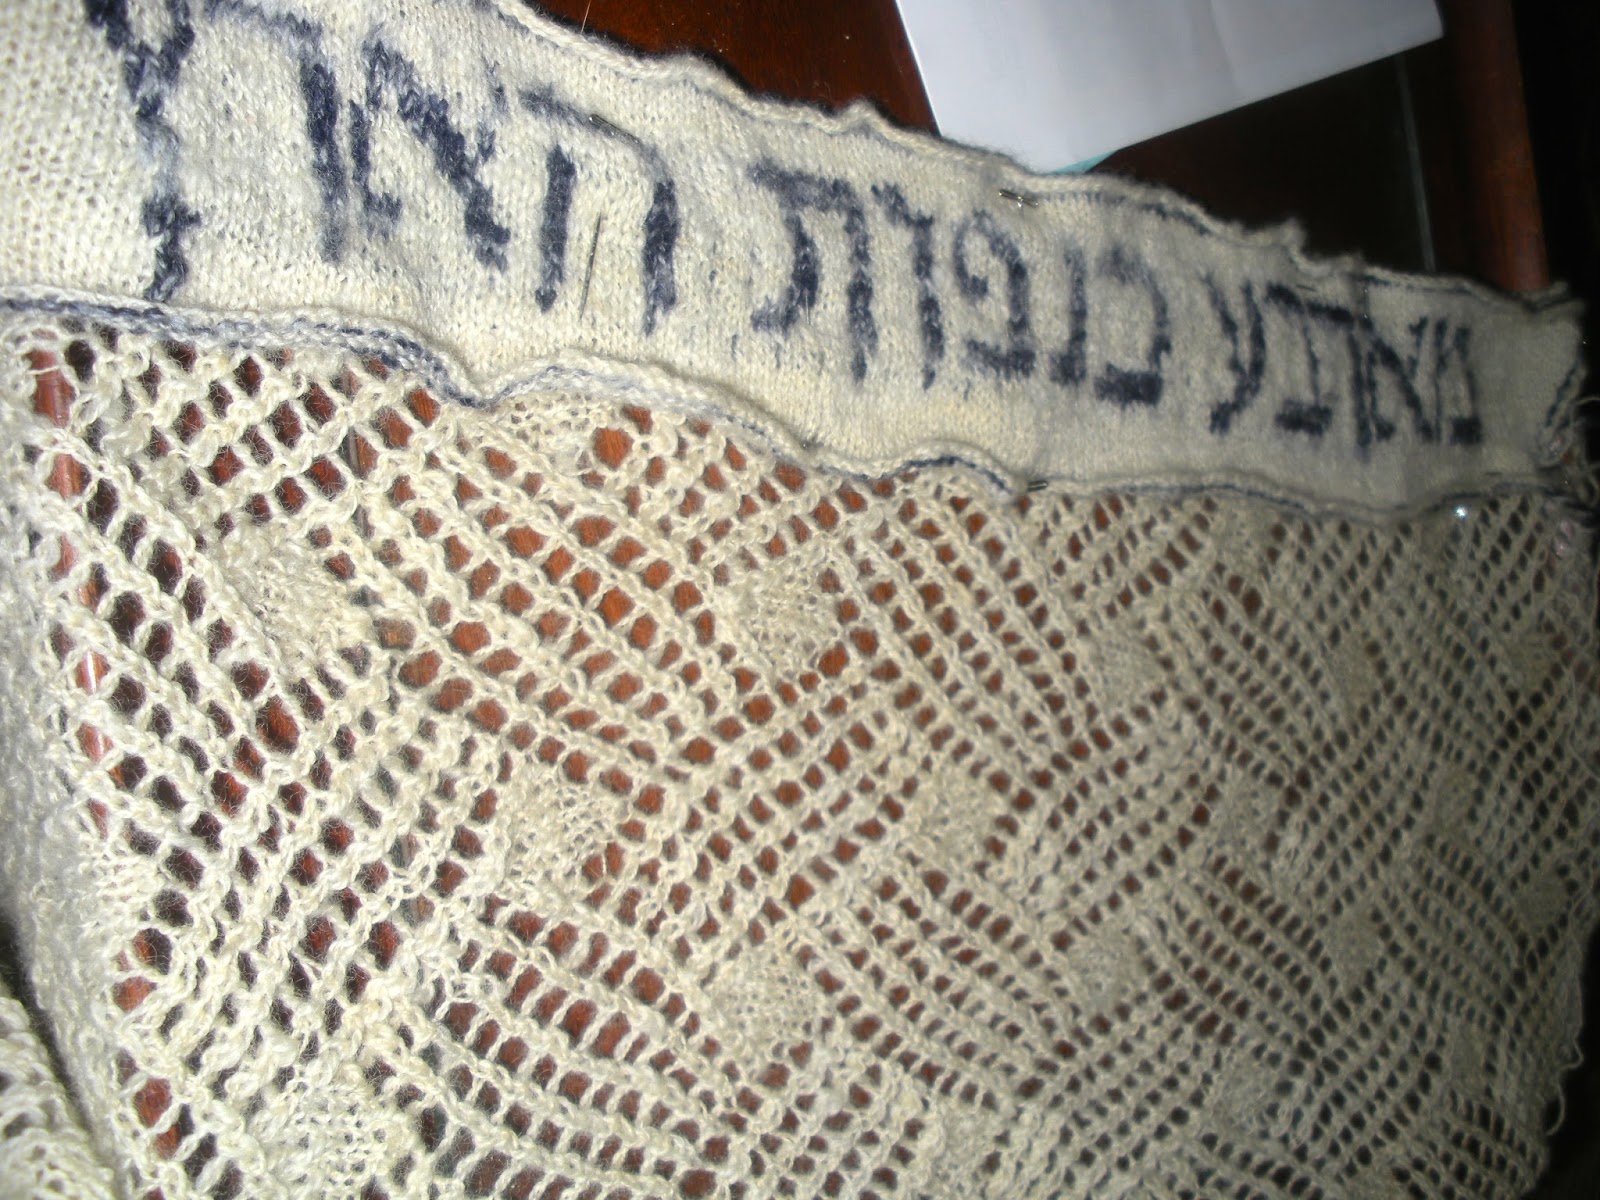
Each part of a project has its charms. When you are just starting, there is the excitement of trying new things, planning (I do it sometimes, I swear) and dreaming, and puzzling out how it is all going to work. In the middle, you are getting the hang of it. You often can just let your fingers remember the pattern and relax. At the end of the project, you start seeing how it will finally look. You get to get out of the rut you have been in for the middle part and do some finishing to make it look just right.

We'll start with the end.

Finished shawl, delivered to recipient
A few months ago, I told you about a lace shawl I was working on with handspun and commercial yarns. Well, I finally finished! I always forget that triangle shawls knit up fast at the beginning and get slower and slower as they go along. So when I think I am three-quarters done, I am actually only half done (or less).

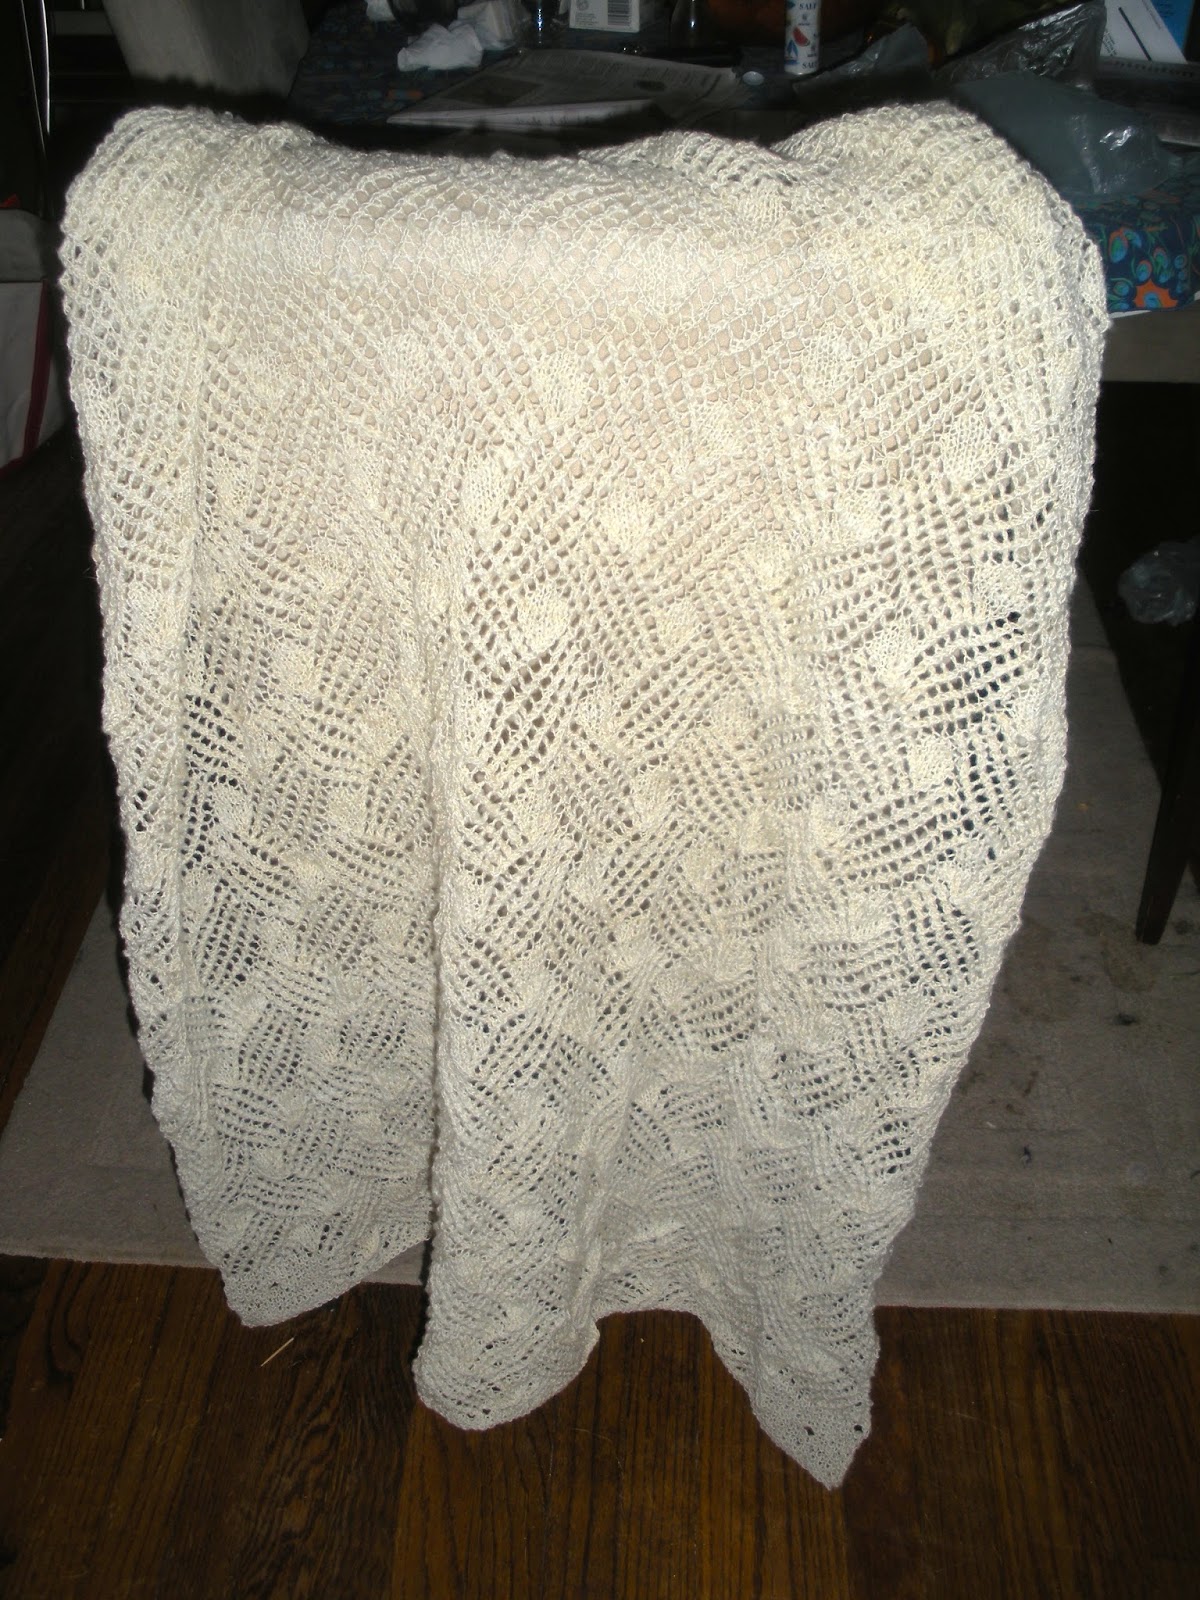
That's the first thing about finishing - it can seem to take much longer than it should. What do they say, the last 10% takes 90% of the time? Not so true in knitting, but it can feel like it!

Once the shawl was actually cast off, I still had to weave in ends and block it.

Pre-blocking, post ends-weaving:
Shawl, pre-blocking
In this case, I wanted to block it in such a way that it would preserve those beautiful waves on two edges. So I could only use my blocking wires on one edge, and just t-pins on the others.

Mid-blocking:
Blocking on the blocking mat
And finally I had to get it to the recipient: a friend who has a fondness for pink and purple.

Completed:
Wearing the shawl
Ok, now for the middle.

Since May I have been working on a spinoodling project. (Like noodling, but spinning. Get it?) I needed something that was portable, and wasn't ready to start something big, so I took out some yummy fiber and my Ashford spindle and figured I would let it speak to me. Again, I didn't really plan out where I was going with this project.
Not so Solid Solids from Little Barn
The wool is not a specified breed, but it is mill-prepared, combed top, with a nice variety of shading. I spun it for awhile and I tried to do it less fine than my previous spinning project. I have half a pound of the fiber, and I don't want to be spinning it forever!

But I guess I've reached that stage in every spinner's life when I have to relearn how to make thick singles. my hands just don't want to do it. And, of course, it's easier to thin a thick part of the yarn (untwist and tug) than to thick a thin part.

So after I had been spinning awhile, I decided that only a quarter of the wool would be used to make a single this thin. I would try making a fluffy, thick single to ply it with. Well, a couple weeks ago I wound my thin single onto my spindle bobbin (reusable straw) and started my thick single.
Thick single on spindle, thin spindle on straw
It's hard! My hands keep wanting it to make it thinner! After a bit of spinning, I started spinning the top from the fold. Thinking about it, I really wanted a nice fluffy yarn from my second ply, to really contrast with the first ply. It's definitely good practice to retrain my hands though. Hopefully, I'll be able to post beautiful pictures of a lovely art yarn when I finish, and it won't vary too much from start to finish (unlike my first major yarn - oy!).
Two mismatched ends of the same scarf. Made from my very first major spinning project.
And finally, we get to the beginning - of a new sweater, that is. This has been many years in the works. Way back at the 2014 Maryland Sheep & Wool festival I got three large skeins of an alpaca/wool blend to make my husband a sweater with.
Surrey, from Brooks Farm - Color #1

Surrey, from Brooks Farm - Color #2

Surrey, from Brooks Farm - Color #3
As usual, I miscalculated the colors I should buy. I always want to buy sets of three colors. Two that match and a third to tie it all together. But so few patterns are written for three colors! So I usually have to find a two-color pattern and modify it. As I am planning on doing here.

My husband always cold, so a nice alpaca sweater will be much appreciated. And the wool in the blend will hopefully keep it from growing too much during wear. I'm a bit worried a how loosely plied the yarn is - I can only hope that it wears well and doesn't pill. From my notes, it appears that I was planning on doing fair isle. But, I don't feel like it (so there). I picked a mosaic pattern: Shulz by Mary Kate Long.

It is top-down, so I am having fun right now with complicated short rows and picked up stitched for the shoulders. It doesn't look like much yet, but I can see the possibilities...


Until next time, happy crafting!

Sunday, July 30, 2017

Sheep to Shawl: Part VII

Whew! It's been awhile since I posted! I've been resting my shoulder, taking it easy, and working to finish up some big projects. Well, I did start a bit of spinning on my wheel, but I'm waiting until it is finished to do a full write-up. For today - I've (almost entirely) finished my shawl I started spinning just a bit more than two years ago.

If you are interested in my progress up to now, in Part I I covered washing the fleece, in Part II I covered prepping it, in Part III I covered spinning singles, and in Part IV I covered plying and finishing the yarn. In Part V I covered starting to knit the shawl and in Part VI I covered the detail work that I did for the neck band.There have also been two other progress reports on the shawl here and here.

Today I will cover all of the little finishing touches that it takes to complete a shawl. I weaved in the ends, blocked it, reinforced the "button" holes where I will be tying on the tassels, and sewed on the neck band. I still have to tie on the tassels, but since that is a religious task, I figured it was outside the scope of this blog.

First, I needed to finish knitting it. It looks about the same as it did the last time I showed you a picture, just bigger:

Finished shawl, before blocking
After casting off, I spent a bit of time weaving in ends. Because there wasn't any colorwork, the only ends were where I switched skeins, and where I had to make spinners knots (because my singles snapped while plying). I find that the easiest way to weave in ends is just to do a duplicate stitch for a bit, then snip off the rest. If the remaining end is long enough, I use a darning needle. If it is too short, I use a crochet hook. Either way, after a few stitches, it is very unlikely to come undone.

Next, it was time for blocking. In the past, I have just used t-pins on a towel for all of my blocking, or just the towel for a light blocking. 

But I wanted this to come out very rectangular and even, and it is very large. I had heard good things about blocking wires, so I figured I should try them. I also bought some interlocking foam mats to pin to. 

The mats I bought come in sets of 9, and can be arranged in any configuration. This gives them more flexibility than a blocking board - if I had a 6-foot scarf, I could block that by setting them up end-to-end. They also store easier. I got two sets of them, but 18 still wasn't large enough to completely block this very large shawl, and some of the t-pins were pinned to the floor.

Interlocking foam for blocking surface - not quite large enough
The blocking wires were really easy to use, but 1) they weren't quite large enough for the whole shawl, so I had to overlap them and 2) setting them up with the damp shawl on my lap was quite tedious. They did give a nice even block, even if I only used them on the sides of the shawl.

Damp shawl stretched out and pinned to the foam blocks
When it was dry, I pulled it up and took out the wires. This part was quite easy.

Next, I wanted to reinforce the holes that I left to tie the tassels onto.
Corner of the shawl, with hole for tassel
I saw several options for reinforcement. The most common was whip stitch, but I wanted something really strong. There was also blanket stitch, but that looked like it was more to reinforce a hem than for a small hole like a button. I ultimately went with buttonhole stitch. It makes a series of knots around the edge of the hole, which are less likely to fray. And it is called buttonhole stitch, so it must be good for buttonholes.
Reinforced hole for tassel
After watching a video, I picked it up pretty easily. It's always good to have another tool in the toolbox, even if I don't make things with buttons very often.

The last bit of finishing was to sew on the neck band. I folded the shawl and the band in half and pinned it, so that it would fall in the right place. I used the t-pins to pin it up and down, because sewing on a stretchy fabric without bunching up is tricky.

Neck band, pinned and ready for sewing
Then I just used some more of the same yarn for whip stitch all the way around. Unfortunately, it seemed to be sagging and uneven, but I was able to mostly fix it by lightly sewing around the letters.
Neck band, all sewed on, mostly evenly
All that is left is to tie on the tassels! I am so excited to have this shawl. Remember, it started out with this:
Leicester sheep
Which became this:
Locks of leicester wool
Before I spun it into this:
Strands of yarn, with quarter for scale
Finally, after many months of work, I have this:
Shawl, being folded as it is meant to be worn, on my shoulders.

Sunday, March 26, 2017

Sheep to Shawl: Part VI

Part I covered washing the fleece, Part II covered prepping it, Part III covered spinning singles, and Part IV covered plying and finishing yarn. Part V covered starting to knit the shawl. There have also been two other progress reports on the shawl here and here.

The end of this project is firmly in sight now.
Current state of the shawl as of late March, with final ball of yarn above.
The plan is for the shawl to be as wide as my arms outstretched, so I have a bit more to go. I will finish off that last ball of yarn, and that should be it - I also don't plan on blocking it too much, because I like the texture. If I knit for my entire commute, I can do 5 to 6 rows (120 stitches each) a day, and each repeat of the pattern is 32 rows. There are already 11.5 repeats finished. So, if I don't get roped into doing another project, it should be finished in a few months.

I have also been working on some of the detail work. This shawl is actually a Jewish prayer shawl (tallit or tallis; pl. tallitot or tallesim). Although there are no real requirements beyond being wearable and having 4 corners to attach special fringes to, tallitot traditionally have a neck band so that a) you know which side is the front, and b) it doesn't fray as easily. 

Often these neck bands (atarah; pl. atarot) have Hebrew writing on them. The prayer you say when putting it on is a very common one - it's right there so you don't forget! But I wanted to do something a bit different. Of course, usually the writing is done with weaving or embroidery, but since I don't do those crafts, I was stuck with stranded knitting. Much slower.

I started out by creating a chart of the writing. I found a font I liked from a needlepoint site and copied the letters into my charting program. The nice thing about using the program (over graph paper) is that it will automatically resize to account for the fact that knitting stitches aren't square. The finished pattern looked like this:


The pattern (with a few mistakes)
It says "bring us in peace from the four corners of the earth," which is the phrase that you say in the morning service right before you gather the four corners of the shawl together in your hand. I did have to do some adjusting on the fly when I noticed some mistakes as I was knitting: two of the letters were out of line with the others, and the automatic resizing made some choices that I wouldn't have. 

I knit the band with blue letters on white, using the flicked, hand-dyed yarn that I have mentioned before, and the first mini-skein that I made for the shawl project (it is a bit rougher, so will have a bit of a different texture than the rest of the shawl). I also increased at each edge, to make a slanted corner, as well as put in a line of blue at the top and bottom. 

There was also another major change on the fly - I finished the bottom row of text and realized that it was plenty wide for a neck band. So I cast off. Now it just says "from the four corners of the earth," which I think is just fine. It gives it a "we're all in it together" vibe, I think.

Well, enough stalling, here's the final product:
Neck band, pre-blocking
Well, that's how it looked before blocking. Because it will be ultimately sewed onto the shawl, I wasn't too concerned with curling. And, since it was knit tightly with small needles (2.75 mm wide), it curls a lot. 

Here's a picture of it getting blocked:
Much better
 Because it is pinned to a white towel, you can really see how off-white the wool is. You can also see that the edges continue to curl a bit, but I am sure that it will go away when I sew it on. I think it came out pretty great, though maybe a variegated blue wasn't the best choice. One more picture to show the edge:
Neck band, sloping edge

Sunday, December 11, 2016

Material of the Month: Linen

This month, I will be talking about another natural fiber: linen. Unlike with wool, I don't have much experience working with linen. I haven't ever processed raw flax, and I have only really worked with one linen yarn. But, since I am currently finishing up a linen shawl, I thought it would be a good material for December. I guess I will give my first impressions.

First, and most obviously, linen is a plant-based fiber. It is derived from flax:
A field of blooming flax
Flax is a grass. To make it into linen, you take the 3- to 4-foot-tall plants and dry them. After beating them to remove the seeds, you place them in stagnant or slow-moving water to rot away the outer parts of the plant. You then dry them, crush them, scrape them, and comb them, until they are ready to be spun. As I mentioned above, I have never tried any of this. I might try spinning it at some point, but since I'd have to isolate it from my wool (for religious reasons), it might have to wait until I have a larger place.

Linen is rarely used for knitting, and, after making two projects with it, I can see why. It doesn't stretch at all - whatever the tension you put into the stitch, that is what it will stay, and you will hurt your wrists and fingers trying to get the next stitch in. It doesn't grip itself either, so it will easily slip off needles or pull out into a loop on the fabric. It is stiff too - when you fold it, the stitches will often slide past each other, rather than bending.

Pretty much the worst technique you can use with linen is mosaic knitting - or maybe cables. Because  both require that the stitches stretch out to multiple rows, and be larger after you have already set the tension, attempting to do them with linen will kill your hands. With wool, it will stretch easily, then settle back later, giving texture. With linen, you have to fight the yarn to get it to do what you want.

And this is why I know you should avoid mosaic knitting with linen
Ok, so those are the disadvantages of linen. Why would you ever use it?

Well, first off, the stiffness and un-stretchiness can be an asset in crochet, and definitely are in weaving. Although I haven't tried it, I hear that it is a dream to weave with.

Secondly, when spun wet, the yarn is beautiful, smooth, and soft.
Louet Euroflax yarn
The fabric it creates is light and airy, and feels good on the skin. It is smooth and washes easily. And it becomes more supple as it ages and gets washed. There is a reason that tablecloths and sheets are called "linens." It does tend to wrinkle, so it needs frequent ironing, but it makes good, firm, fabric, especially for summer use.

Speaking of summer use, I did almost finish my linen summer shawl today. Something about the pattern of colors reminded me of a snake, so I called it a snakeskin shawl. I was using big needles with a simple pattern, so it knit up in a little over a month.

Even aside from using three colors in the shawl instead of two, I ended up modifying the pattern pretty heavily. It was supposed to be a right-triangle shawl, where you knit from one corner, growing by a stitch every other row, until you are knitting the entire other side of the shawl. But it was getting too wide for me - I wanted something a bit more scarf-like. So I added a SSK decrease to the rows that were supposed to be growing, and turned it into a crescent shawl. I also added a black border at the neck to make it more sturdy.

Ok, one more thing about linen. It is really important to block it, because the stitches need to be evened out and "wrinkled" so that they will stay in the places you put them. So that is what I did today.

Snakeskin shawl, pre-blocking:
Notice how the elongated stitches are not lying flat before wet-blocking
And wet and pinned to a towel for blocking:
The end of the shawl where it "grew" every other row
The end of the shawl where I added the extra SSK

Monday, October 24, 2016

Three Fiber Preps: Mill Combed, Flicked, and Hand-Carded

Just a quick update this week. I continue to work on the shawl, but I have run into a bit of a snag. I have finished 9 repeats of the the pattern (32 rows each) and I have enough yarn for another repeat. But the shawl is not nearly long enough: It needs another foot or so before it is a wearable length. So I am going back to the spinning wheel, and spin more yarn. I can't do this on the metro though, so I will have to start another portable project soon. Stay posted for more on that when I decide what I am making.

Meanwhile, I have been on a bit of a spinning binge. Once I had dyed the locks I immediately wanted to see what they would look like as yarn. But I wanted to spin it to match the rest of the shawl, so I had to do it on my Ashford wheel (maybe not, but I wasn't risking it). Unfortunately, my Ashford was occupied with the black merino bulky yarn I have been working on (and off) since June.

Aha! Motivation to finish it!

2-Ply Bulky Merino Yarn
The yarn was prepped from some yummy (and surprisingly cheap) merino top (mill-processed) that was being sold by the ounce by Delly's Delights Farm at Maryland Sheep and Wool. This skein came out more even and squishy than the blue one, so I think I actually learned something. It's always nice to have some evidence of improvement.

Once my wheel was clear, I could start on the hand-dyed blue yarn for the shawl detailing. I started by flicking the locks - a few locks of blue with a few undyed.

Dyed and undyed locks for flicking
To flick, I wrapped about half of the lock around my fingers and brushed it with the flick carder. There was a lot of VM, so I had to do a lot of brushing to get it all out (and even so, I missed some). I started with the butt, then did the tips the same way.
Wrapped and ready to flick
After flicking
As you can see, the process really opens up the locks.

I also got a LOT of VM all over my cloth, my pants, and the floor. This sheep was a pet, and wasn't coated - I am pretty sure it liked to roll around in mulch. I wasn't too careful with the washing either, so there was also a lot of waste. It was hard to grip the lock while still getting all of the VM out, and the lock structure wasn't well-preserved.

Because there was so much waste, and it had a lot of pretty serviceable wool in it, I carded and blended the waste into rolags, and am spinning it into some thicker, textured yarn now.
Waste from the flick carding
Rolags carded from the waste wool. I like the periwinkle color, but there is still too much VM.
Well, the flick carding didn't actually blend the colors any, despite my hopes, so the flick carded yarn is "barber-poled" to get a lighter look. I think it will still look good knitted up. It is hanging to dry now.
Hand-dyed, hand-spun yarn from the fleece
The carded prep is making a nice periwinkle yarn though.
Hand-dyed, hand-spun yarn from the fleece
It goes to show, though, how much difference the fiber prep can make to the final yarn.

Sunday, October 9, 2016

Dyeing for the first time

Whelp, I did some dyeing. I know I said that it was too messy and I wouldn't do it, but my shawl needed a bit of color, and I was bound and determined to make everything in it from raw fleece. So I bought a small amount of acid dye (enough to dye 4 lbs of wool, the smallest amount they sold) and did a bit of dyeing today. I am currently waiting for it to dry so that I can find out whether or not it felted.

First, I started with a small amount of wool. I scoured 2 oz using dish soap, ammonia, and vinegar (just like I did for the rest of the shawl). The tips were still crusty, but flicking should deal with that when I spin.
Dry leicester wool, ready to dye
I took about an ounce and made sure it would fit in my "dye pot": a mason jar.
Measuring out an ounce of wool
Next, I soaked the wool in warm water for an hour, to make extra sure that all of the soap was out.
Soaking the wool
I mixed a small amount of dye powder with water in the mason jar while the wool soaked. Unfortunately, I didn't have any way of measuring the tiny amount of dye I would need for only an ounce of wool (the directions call for 1/4 ounce of powder per pound of wool). So I guessed the amount. Maybe I should have bought something to measure? I did get a dust mask though - the dye powder can be hazardous!

I filled the mason jar halfway with hot water from the tap before putting in the wool. I didn't want to agitate the wool by filling up the jar with it in there.
Jar filled with dye
After adding two tablespoons of vinegar to set the dye, I cooked the wool in a double boiler for an hour, making sure that the water never got hotter than a simmer. Occasionally, I would turn the wool over with a chopstick.
Cooking the wool and dye
I must have put it the right amount, because the water was almost entirely clear when I pulled the wool out, and the rinsing required was minimal before no more dye came off the wool.

I set it to dry on some newspapers. It's a bit darker than I was going for (though we will see how it looks when it finishes drying) but I can always mix it with the undyed wool for a lighter color. Well, how do you think it looks?

Wet, dyed wool locks

Sunday, September 4, 2016

When do You Fix It?

Much of the beauty of knitting is in the careful repetition and symmetry of stitches. A project, whether you are working off of a pattern, using a stitch from a dictionary, or are improvising, is usually regular in some way. Even if the person doesn't know the pattern, they may well notice that one part doesn't look the same as the others.

Even worse, because of the repetition, later parts of the pattern rely on there being the right number of stitches. Especially in the round, if you are repeating by 8, and you mess up so that you end up with 55 stitches, it is not going to look right.

Still, many mistakes will be invisible to the average observer. Few people will be staring at your project up close for hours (exception: spinning projects, but it will probably just be you). When do you tink back, frog,  or start over, when do you make a "good enough" fix, and when do you ignore it completely?

I rarely will frog or start over (this explains my vest with the ridiculously large sleeve holes). It is just so frustrating to realize that something is not working out, sometimes you just lie to yourself, and let yourself be lazy. Well, I do at least. Once something is done, I want it to stay done. I don't want to do it a second or third time.

A scarf from 2013 that shouldn't have been finished
But I rarely just let a mistake sit there - except for sizing mistakes, I haven't quite got the hang of that one. There seems to be an extra stitch where there shouldn't be one, but there are no gaping holes in the piece? Just add a decrease as soon as you can and hope you counted right. Find yourself one stitch short? Make one, it probably won't matter. Did an entire repeat of the pattern backwards, offset, or upside-down? Eh, call it a design element and do it that way again after a few repeats.

Heck, the first sweater I ever made (sorry, I don't have a photo) I hadn't knitted in several years. So I wrapped all of my purl stitches backwards and twisted them, and didn't realize that this was wrong until half the sweater was done. Well.... it was just a thicker, warmer sweater than I was planning (and was too small for my brother to wear, so it got donated to charity). It's not a mistake if people don't know the original pattern, it's an original design.

Sometimes, a mistake can just be fixed without too much effort. If you miss a yarn-over in a lace pattern and catch it within a few rows, you can usually, just make one and bring it up, and it will just be a little bit tighter than otherwise - barely noticeable.

But sometimes, you make a mistake in adapting the pattern, and it takes you awhile to notice. Then, you have only two options - start over or change the pattern. In the most recent hat I was making, I cast on 68 stitches. Most of the hat consists of k2 p2 rib, so I figured it didn't matter, as long as it was a repeat of four. Well, it turns out that the decrease for the crown of the hat is an eight stitch repeat. Lesson: always read the whole pattern before starting. But what to do? Just doing the pattern halfway would look odd, because the hat is knit in the round.

Rather than starting over, I wrote a new pattern of decreases. The number of decreases per plain worked stitches was the same, to keep the shape similar, but it was done in a four-stitch repeat, rather than an eight-stitch repeat. It worked out well, and I can't actually tell the difference.

Undyed jacob wool hat for dad
I also misread the pattern for my shawl. I wanted it to be wider that the original pattern called for, so I added additional repeats of the lace pattern - so far, so good. The repeat was 16, so I cast on 160 stitches, and worked it for a full three inches. I wanted squares of a different pattern on the corners, so the first and last repetition were just done in seed stitch. And then, I started to follow the pattern for the edges and my mistake was all too clear - the original pattern had four additional stitches on the edge to keep the piece from curling!

I had seen that there was two stitches of seed stitch on the beginning and end of each row to keep the edges from curling (stockinette will curl, especially when tightly knit; garter and seed stitch will not). What I hadn't noticed was that they were not included in the chart - they were extra.

At this point, I had a choice: start over with four more stitches or adapt the pattern. I couldn't add four more stitches at this point, because it would ruin the rectangular shape of the piece (I think. Maybe it could have worked). Well, of course I chose to just go with it, because I am me, and it has been giving me trouble ever since. Since I can't follow the original pattern, every row I need to figure out what to do with the first few and last few stitches. I have a placeholder to make sure that I don't accidentally add or subtract stitches, but my choices have not been terribly consistent, and the border looks ragged. At least to me.
Ragged, inconsistent edge.

This was supposed to be a rectangular shawl! Maybe it will look better after blocking. Which will be sooner rather than later: the shawl is more than halfway done at this point, assuming I don't decide I need to spin more yarn.

Progress on the shawl as of the beginning of September