header picture

header picture
Showing posts with label colorwork. Show all posts

Sunday, September 3, 2017

Baby Blanket for January

Happy September everyone!

With the upcoming move to a larger place, and an exhausting trip to see the U.S. eclipse, I haven't had much time for knitting or spinning recently. And I'm not looking forward to packing up all of my stash either (and, you know, other things too), so this might be the last post for this month. But I did want to share my newest knitting project with you all.

I'm making a baby blanket for the little one we are expecting in January.
New baby will probably look something like this.
It's been awhile since I made a blanket, since they are so large. I'm generally a fan of working with smaller needles, and a blanket takes forever with small stitches. So I'm pretty sure that the last time I made a blanket was in high school.
My version of the Sunny Days Throw in blue and purple from Knitting Digest Magazine
I'm actually using the blanket to warm my toes at this very moment, so I've gotten my time out of it. I vaguely remember that I wanted to use the blue yarn from my stash (Wendy X-treme, a gift from someone else's destash) so I bought the lavender yarn to match it. I'm pretty sure the purple is wool, and it has shed like no tomorrow (it's a bulky single ply), but the label for it has been lost to the mists of time.

So, onto my current project. My husband picked out the yarn so that he could participate. I told him that he should get:
1) acrylic yarn, so that it is washable,
2) bulky yarn, so it won't take too long to make, and
3) one or two different colors, since most patterns are written for that.

Unfortunately, while his color sense is ok, he knows absolutely nothing about fiber arts. The yarns were both acrylic and bulky, but one was super-bulky, and one was just regular bulky/chunky. He got me Lion Brand's Hometown USA in silver and Big Twist brand's Chunky Yarn in blue-green. Beautiful together, both soft, both large and easy to knit up, but very different weights.

Well, crafting is nothing without a little challenge, so I went looking for a pattern that would combine the two in a nice way. I figured that a mosaic pattern would be great for two colors, not too difficult to remember (I'm still coming off of my lace shawl and wanted something a bit simple for now), and might even be better with two different weights. If I used the bulkier one as a highlight on the other, it might "pop" out of the fabric and give it a nice texture.

For my pattern, I decided on the Two Colour Slip Stitch Throw by Sandra Oakeshott. I kind of wanted to give a little love to a pattern that hasn't been done too often (according to Ravelry) - maybe someone will decide to try the pattern that I wrote as a cosmic payback. I hate the colors that she used for her example blanket, but I will be using turquoise and silver, so that part doesn't matter.

Anyhow, how does it look so far?
About 6" done on the blanket - a little more than one repeat
I think it is coming together nicely. The silver certainly pops out of the fabric, and the pattern is very easy to remember. I am out of practice with knitting using large needles (size 11, in this case) so it is a tad bit awkward, especially to purl. But it is going very fast with the easy pattern and the bulky yarn, so I am pretty sure that I will be able to finish in time.

One more look at the pattern close up and stretched out a bit:
Close up of the pattern

Sunday, March 26, 2017

Sheep to Shawl: Part VI

Part I covered washing the fleece, Part II covered prepping it, Part III covered spinning singles, and Part IV covered plying and finishing yarn. Part V covered starting to knit the shawl. There have also been two other progress reports on the shawl here and here.

The end of this project is firmly in sight now.
Current state of the shawl as of late March, with final ball of yarn above.
The plan is for the shawl to be as wide as my arms outstretched, so I have a bit more to go. I will finish off that last ball of yarn, and that should be it - I also don't plan on blocking it too much, because I like the texture. If I knit for my entire commute, I can do 5 to 6 rows (120 stitches each) a day, and each repeat of the pattern is 32 rows. There are already 11.5 repeats finished. So, if I don't get roped into doing another project, it should be finished in a few months.

I have also been working on some of the detail work. This shawl is actually a Jewish prayer shawl (tallit or tallis; pl. tallitot or tallesim). Although there are no real requirements beyond being wearable and having 4 corners to attach special fringes to, tallitot traditionally have a neck band so that a) you know which side is the front, and b) it doesn't fray as easily. 

Often these neck bands (atarah; pl. atarot) have Hebrew writing on them. The prayer you say when putting it on is a very common one - it's right there so you don't forget! But I wanted to do something a bit different. Of course, usually the writing is done with weaving or embroidery, but since I don't do those crafts, I was stuck with stranded knitting. Much slower.

I started out by creating a chart of the writing. I found a font I liked from a needlepoint site and copied the letters into my charting program. The nice thing about using the program (over graph paper) is that it will automatically resize to account for the fact that knitting stitches aren't square. The finished pattern looked like this:


The pattern (with a few mistakes)
It says "bring us in peace from the four corners of the earth," which is the phrase that you say in the morning service right before you gather the four corners of the shawl together in your hand. I did have to do some adjusting on the fly when I noticed some mistakes as I was knitting: two of the letters were out of line with the others, and the automatic resizing made some choices that I wouldn't have. 

I knit the band with blue letters on white, using the flicked, hand-dyed yarn that I have mentioned before, and the first mini-skein that I made for the shawl project (it is a bit rougher, so will have a bit of a different texture than the rest of the shawl). I also increased at each edge, to make a slanted corner, as well as put in a line of blue at the top and bottom. 

There was also another major change on the fly - I finished the bottom row of text and realized that it was plenty wide for a neck band. So I cast off. Now it just says "from the four corners of the earth," which I think is just fine. It gives it a "we're all in it together" vibe, I think.

Well, enough stalling, here's the final product:
Neck band, pre-blocking
Well, that's how it looked before blocking. Because it will be ultimately sewed onto the shawl, I wasn't too concerned with curling. And, since it was knit tightly with small needles (2.75 mm wide), it curls a lot. 

Here's a picture of it getting blocked:
Much better
 Because it is pinned to a white towel, you can really see how off-white the wool is. You can also see that the edges continue to curl a bit, but I am sure that it will go away when I sew it on. I think it came out pretty great, though maybe a variegated blue wasn't the best choice. One more picture to show the edge:
Neck band, sloping edge

Tuesday, March 14, 2017

Knerd Knitting

Ok, I'll admit it: I'm a nerd. My whole family is nerds. And not in the way that has come to include everything from music enthusiasts to old movie buffs to knitters. Those are geeks. We are nerds. Although you can be both, I'm not sure that I qualify as a geek.

My parents met doing a play together at a Science Fiction Convention. I grew up reading as much fantasy and science fiction books as I could get my hands on. My brother has a collection of Magic the Gathering cards that numbers in the thousands. And my husband spends his spare time making Pathfinder RPG characters for kicks and playing tabletop RPGs over the Internet (although that is a bit of a contradiction, I don't know a better way to describe it).

Now, obviously, I am also a devoted knitter. So it is always a pleasure to combine my knitting with my nerdy heritage.

Sometimes, this involves items to help with nerdy activities, and sometimes they are regular items that are decorated in nerdy ways. For the first type, I made a pair of dice bags a few years ago, mostly knit while doing all-day tabletop RPG marathons.
Two dice bags made in 2011

The basic pattern was extremely simple: make a rolled brim hat with two holes on the brim, then fold the brim over and sew it with a drawstring. (Maybe someday I should write up the pattern) When I made these I had already made a few for my college science fiction club raffle, but I don't have any pictures of those.

The first one in this picture has an intarsia boat on it, and is made out of cotton. I knit this while playing 7th Sea, a pirate themed RPG. Since that game uses exclusively 10-sided dice, that is what I keep in there.

The second one in the picture was made out of mostly wool scrap yarn, and has a duplicate stitch picture of a 20-sided die. It's not the best picture I have ever made, but I was pretty pleased with how it came out, given that I made the pattern myself. That's the bag I keep most of my dice in.
A 20-sided die. You can see the resemblance, at least.

I have also made a few bits of clothing here and there that were decorated in nerdy ways. I have showed you the astronomy hat that I made for my husband, and also I briefly mentioned the Jayne Hat that I made for him, as well.
Jayne Hat
If you didn't know, on the show Firefly (of which my husband is a huge fan), a character named Jayne wore a hat like this for a single episode. It was a bit of joke, because he was such a tough-guy character, but he insisted on wearing this ugly, poorly-designed hat because his mom sent it to him. Anyway, because so few episodes were made, fans tend to focus on the tiniest details, and someone wrote a pattern for it. It made a perfect birthday present. I guess it sort of straddles the line between costume and nerd-themed couture, but my husband wears it all the time.

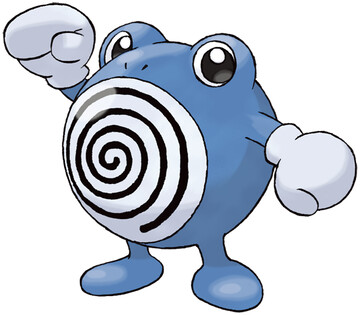
You may be wondering what brought this topic to mind. Well, although I haven't been writing much, I have been furiously knitting away. One of the projects I finished this past month was a pokemon-themed scarf for my brother.

We used to watch the Pokemon show together growing up, and he played the games and collected the cards (I'm not much of a gamer, though). His girlfriend is also a fan, and her birthday was coming up, so he commissioned a scarf that would be reminiscent of her favorite Pokemon, polywhirl:
Well, I started by making two black and white spirals, adapted from Frankie Brown's Double Ten Stitch blanket. Then I added a blue border. This involved a lot of going back and forth (the "rows" were only 8 stitches, 4 white and 4 black), as well as many short-rows for the corners.

Finishing up the first spiral with a band of blue
The black and the white parts were knitted from random scraps of worsted-weight wool that I have been collecting over the years, mostly for making penguin slipper-socks.

The blue, though, was some of the first yarn I ever got. It is from Columbia-Minerva (a company I don't think even exists anymore) and I got it from my mother. She doesn't knit, but she used to crochet. When I was 8 and started to show an interest in knitting, mom went up into the attic and gave me the blue yarn that she had gotten to make a vest with when she still had time to crochet. I had used most of it over the years, but I finally used up most of the last ball making this scarf. The one problem was that, because it had been sitting wound up in the ball so long under tension, it had snapped in parts, so there was a lot of weaving in ends for this project.

Let that be a lesson: long-term storage should be in the skein, or in a loosely wrapped ball.

After I finished the spirals, I knit a plain old blue garter-stitch scarf (I had a short deadline to finish it) and joined the two sides with kitchener stitch.

Polywhirl scarf. Folded a bit in the middle to make it fit in the photo.
I like how the slightly thicker black and white yarn gave the scarf bulging ends. And it does sort of remind me of polywhirl. I wish I had a picture of the recipient wearing it, but all I have is this shot of it folded up and ready to be sent out:

Scarf folded up and ready to gift

Sunday, November 27, 2016

Technique: Stranded Knitting

I haven't started yet, but coming up, I will be doing blue detail work on the shawl with stranded knitting. It's been awhile since I used that particular technique, because I usually prefer my work to look good on both sides (and I hate the way stranded knitting looks on the back). But, this piece of the shawl will be sewed so the back doesn't show. Time to review tips!

While I was home for Thanksgiving, I hunted around for old pieces that I didn't have pictures of so that I could show you all some early attempts. It's always nice to see how far you have come. Actually, both things I found were hats with stranded knitting that was too tight. I made both in high school.

First up, a hat made from a vintage pattern, from before I had any style:
Pattern from Jill C. Weiner: Side view
Back view
I vaguely remember picking the pattern because it was one of the ones that the book listed as "hard" and I wanted to challenge myself. Except for being an ugly pattern, it came out mostly ok, and has improved over time as the yarn stretched. However, at the time, I did not know how to do stranded knitting at all, and the hat has very long floats on the pink squiggly in the middle (as well as being too tight in that section). First tip: be sure to carry the non-working yarn along with you by twisting it with the working yarn every 3 to 4 stitches. This ensures short floats on the back that won't snag so easily.

Ok, second example. In high school, I made a bunch of berets from a basic pattern I had. Once, I decided to make it fancy by adding stranded colorwork of my own design:
A beret of my own design, from high school
Well, the pattern came out ok, and I would do it again -- though that light blue really clashes with the other colors: what was I thinking? However, although I carried the non-working yarn this time, I made it far too tight, and the beret puckers up, and won't lie flat. The shape is really weird. So, second tip: Make your floats twice as loose as you think they should be. Better too loose than too tight. 

Well, getting into college, I tried again. This time, for a Valentine's Day gift swap:

Heart hat
 The knitting is plenty loose, but this time I made a different error: I assumed that knit stitches are square. I drew hearts on graph paper and transferred the pattern faithfully to the hat. But, since the stitches were rectangular, my hearts came out far too wide and ended up looking like bats. So, third tip: if making your own pattern, account for the fact that knit-stitches are rectangular. There are three different ways to account for this. The hardest is to knit a swatch and measure it. Use the number of stitches per inch both horizontally and vertically to see how your pattern will stretch, and compensate. The other options are to buy knitting pattern graph paper at a knitting store, or to use a program like I do now, which automatically stretches the pattern after you have sketched it.

Ok, final example. I really haven't used the technique much, so this is what I have:
A hat made on commission for a co-worker
This one came out looking great, actually (though I made a rolled-brim hat for a guy, for some reason). The only thing was that off was that, because I made the hat in the round, I had to float the red across the entire back of the hat. So, final tip: if you are only putting the pattern on one part of the piece, do flat knitting and do intarsia instead.


Tuesday, July 26, 2016

Neck Warmer etc.

Whew! End of July already? Where did the time go?

Mostly into commuting. I am literally spending 3 hours a day on the train and bus.

It has been good for my knitting, because it is nice and portable, but I have been a bit behind on my spinning. It's not easy to carry your lazy Kate around with you! That said, I am pretty close to finishing my fluffy cotton-candy yarn. The three singles are ready to be plied, sitting on my lazy kate; sitting on my bookshelf so they come down from over my shoulder while I spin.

Had to push some books out of the way to put it up there, though.

I was expecting a lace-weight yarn, but it looks like it is going to be sport-weight. I still don't know how the plied yarn really looks. I am getting a sense, but I am looking forward to seeing it on the niddy-noddy.
Three-plies, on the spindle
I am also working on the beach skirt: it is almost done, and I promise there will be a post all about it when I am finished.

I have a quick update on another project though. Back in November, I made a hat using brioche stitch. I mentioned in my project update that I was starting a matching scarf to use up the yarn. So, did any of you wonder what happened with it? (of course not, I am talking to myself)

Well, I put it in my project bag, then someone cleaned the apartment and stuck the project bag in with my yarn stash. Since that room eats things, I didn't even think of it again until last week.

I was filling out the forms to submit a few projects to the Maryland State Fair again this year. I wanted to submit my brioche hat, but I know that hats are going to be a very crowded contest. So, looking over other categories I could submit to, I noticed that there is one for a hat/scarf set. Perfect! Now, where did I put that scarf...

Anyway, I finished the scarf. But I kind of ran out of yarn. So it is not really a scarf. I'm calling it a neck warmer, and hope the judges won't be too picky about it.

Hat and neck warmer set
The one thing that I wish I did differently, is that if I knew it was going to be a neck warmer, I would have done a provisional cast on, so that I could connect the two ends seamlessly, instead of having a somewhat messy seam.

Neck warmer with seam. Can you spot it?
Anyhow, even if the judges aren't fans, I know the hat is super-duper warm, and I bet the second part of the set will be just as nice when winter hits.

One more view of the warmer:
What a twist!


Sunday, January 31, 2016

Spinning with Color

One of the hardest things to learn about buying fiber for spinning is that, no matter how pretty the fiber colors are, it will not look like that when it is spun.

Unless you are doing a gradient of some kind, the colors will mix and mingle as you spin them. You get this a bit with knitting variegated yarns, but less so - for the most part, the colors never "run" together like a bad watercolor.

Now, maybe I am just inexperienced, and, if I knew what I was doing I could get clean, clear color transitions. But I think that it is more than a matter of technique. If I want that kind of yarn, I need to dye it after I spin it.

So, for instance, if I buy wool that looks like this:
Yellow wool from Little Barn
The final yarn will be much more uniform, with almost no variation across the yarn:
An early yarn made on my wheel, 2-ply
There is a depth of color, but the shading that I really enjoyed in the fiber just isn't there in the final yarn.

Sometimes, the colors I get are completely unexpected though:
Jacob roving from Blue Flower Flock
I thought that this would come out mostly white, with a bit of gray tinge. Nope! I got a nice, dark tweed.
Three-ply Jacob skein
And finally, the spinning project that inspired this post. I took a batt of dyed coopworth and spinnoodled (this is now a thing) a small skein this week. I could tell that the locks had been partially felted when they were dyed, and the drum carder had difficulty in making a usable batt. But the colors were really interesting:

Rough coopworth batt from Blue Moon Fiber Arts
Maybe I just don't know how to handle this kind of stripey fiber, but it came out really weirdly blended:
2-ply skein on the niddy-noddy
Maybe it is just me, but the colors don't seem to match at all with what I started with.

Here is a close-up:

Well, it is interesting. I don't know what I will make with it. Maybe I will only spin from uniform colors in the future, and leave variegated yarns to the dye vat.

Thursday, December 24, 2015

Can This Project Be Salvaged?

Three years ago I started a hat for my husband. I had been doing a lot of double knitting (which makes colorwork really easy, if time consuming) and decided to make an astronomy hat for him.

In double knitting, the back of the project is the photo-negative of the front. Astronomers use photo negatives to look at stars more easily. My husband is an astronomer. Ergo, I would make him a reversible hat that would show the moon and stars, and would be an astronomy negative on the inside. Since he is always cold, I would give it earflaps. And, just to add a bit of color, The ear flaps would portray a sunset.

I used MacStitch to design the moon, and I also added a shooting star. The stars themselves would be individual stitches placed somewhat randomly in the knitting.

I picked out my yarn: black (of course) and a variegated gray that I had to give the moon (and the negative) some texture. Since it was fingering weight, I doubled it to make worsted-weight yarn.


A good color for a moon?
It was going to be glorious. And then it all went wrong.

Mostly, it was simply poor planning. The pattern looked great! But I spent so much time thinking about the colorwork that I managed to make a mis-shapen thing that could only generously be called a hat.

Would you wear this?
So, 11 months after I started it, I shelved it and declared it a failure. But...

I never got around to ripping it out. I was so annoyed that I had spent all that time for nothing, that I was disgusted with the project. I didn't want to keep working on the sign of my incompetence. But I wasn't actually willing to pull it apart either.

So...

Today I thought I would have another go at it. I ripped back to the edge of the crown and carefully put it on a needle, looked at some patterns for earflap hats (to get a better sense of proportions) and got to work.

I hadn't recorded what needle I used, so I guessed a 7, but otherwise, there haven't been any major snags. It was a bit hard to figure out where the round starts too, but not impossible. It took awhile to get all of the stitches on the needle in the right order (double knitting means twice as many), but I am well on my way.

With a little distance from the disaster, it feels less like I wasted a ton of time, and more like a salvageable learning experiment.

My other colorwork hat that I have been working on is done. I will post on it when I have the pictures up.

Thursday, October 22, 2015

Brioche Hat

I needed a project small enough that I could knit it standing up (while waiting for the bus), interesting enough that I could do it for 20 minutes with nothing to distract me, but easy enough that I wouldn't need a pattern in front of me.

So I started another hat. Now you know why I have so many hat projects.

I actually already have a hat on the needles, but it is a complicated mosaic pattern on yarn that needs good tension (read: must be sitting down) on double pointed needles (read: doesn't travel well). I'll try to post something about that project sometime soon.

But today, I am going to talk about my new brioche hat.

For my birthday, my boss gave me a gift card to my LYS. Dangerous, I know, tempting me into the shop when I have so much stash to use already. But I was good. I bought two bulky-weight skeins of yarn, one solid, one variegated. They were super-soft (merino wool) and I was thinking that I needed a winter hat for myself, so I can stop borrowing my husband's.


Cascade 128 Superwash
I was looking for patterns that would highlight the two colors together. My mother-in-law has been working in brioche stitch, and it looks great, so I was thinking that I would try the same. I found a great brioche hat pattern in one of my knitting books: Weekend Knitting by Wendy Easton.

I don't use the patterns in my books nearly as much as I should. I have a bunch of them that I have bought or that have been gifts (that's actually most of them). I love my stitch dictionaries, but I rarely follow patterns too closely. And so many of the patterns I have are colorwork or need specific yarns: I would rather use the yarns I have.

That said, I had never tried brioche before, and I had heard that it was really hard. Having done it, it is not too bad, but takes a bit of time to get the hang of it and figure out what is going on. A youtube video helped too: trying to describe it is very difficult. But, I will put in my two cents: maybe it will help someone who thinks like I do.

This is the pattern in the round, which is easier (I found):

Set up (color 1): knit 1. *put yarn to front and slip 1 purlwise. knit 1 without putting yarn to back to make a yarn-over. repeat from *.

Round 1 (color 2): put yarn to from and *slip 1 purlwise (this will be color 1). yarn-over. purl two together (1 yarn-over of color 1 and one stitch of color 2). repeat from *.

Round 2 (color 1): knit two together (1 yarn-over of color 2 and one stitch of color 1). *put yarn to front and slip 1 purlwise (this will be color 2). knit two together without putting yarn to back to make a yarn-over. repeat from *.

Repeat rounds 1 and 2.

To do it flat, do a four row repeat: round 1 (color 2), round 2 (color 1), turn, round 2 (color 2), round 1 (color 1).

My hat looks like this so far:
Outside

Inside

The material is really stretchy and thick, and I love how the colors look.

Depending on how the crown goes, I might submit this one to the state fair.