header picture

header picture
Showing posts with label techniques. Show all posts

Sunday, July 1, 2018

Entrelac


Currently working on a scarf using entrelac, so I think I will talk about entrelac today.

Entrelac means "interlaced" French. It is a technique that can make a very nice "woven" texture if done tightly, and a pleasing checkerboard if done loosely. But I'm not going to teach how to do it here. There are much more qualified teachers online, and I encourage you to find either a video or written description and try it out.

Here I am going to talk about two things: how entrelac is a great technique to play with colored yarns, and the importance of learning backwards knitting if you want to do very much of it.

I have done a few projects using entrelac. The first one I tried was a large triangular shawl in 2012. The nice thing about doing a triangle with entrelac is that you don't have to do the side triangles, so there are almost no short rows. I knit it loosely, starting with 25 squares of 10 stitches each. There wasn't much of the entrelac texture, but I liked the checkerboard pattern it made.

Entrelac shawl from 2012 in black and blue
My friend modeling the shawl
I made the shawl with sock yarn on size 6 needles. Notice how the technique is a good way to highlight a variegated yarn with short color changes. The solid color makes the variegated color pop, and the small squares allow you to have color pooling in a large project.

I also made an entrelac tam with a similar set of yarns, although this was knit tighter, and with thicker yarn:
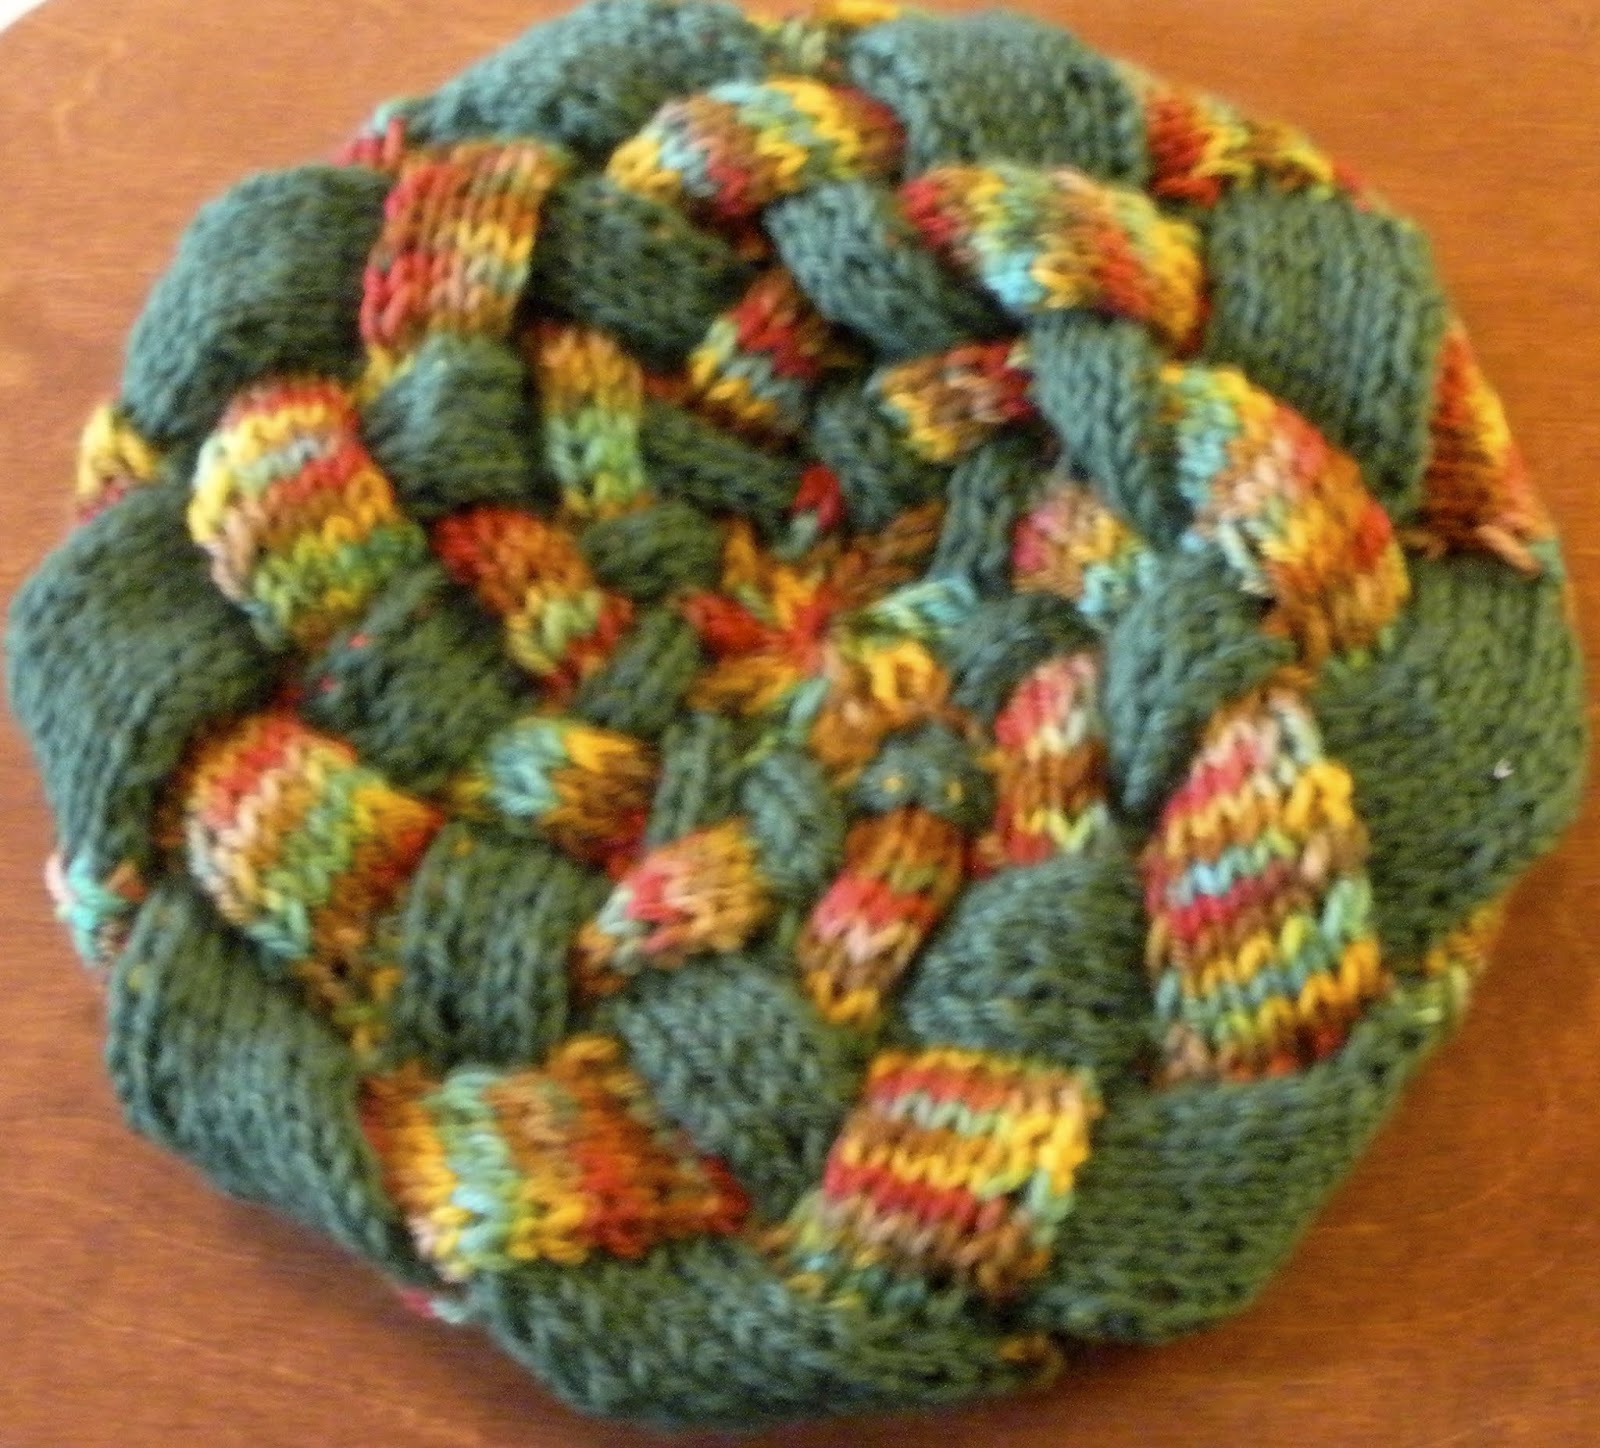
Entrelac tam in green and multicolor
Notice that with the smaller needles relative to the thickness of the yarn there is a significantly tighter knit, and that the interlacing is more pronounced. But again, alternating between squares of a solid color and a multi-color yarn with a short repeat highlights the multi-color nicely (even if, as in this case, the yarn has so many colors it might derisively be labeled "clown barf").

I also made a similar hat without the solid color.
Entrelac tam in shades of blue
This time, although the texture similarly comes through due to the tight knitting, the variegated yarn by itself confuses the eye. It is no longer so clear that it is an ordered interlace. I also want to highlight that this is a slightly longer color repeat, so that most squares are pools of one or two shades, rather than the hodgepodge of the previous yarn.

One final tam. This one was made with only solid colors.
Entrelac tam in black, green, blue, grey, and white (side view)
This one highlights that entrelac is a great vehicle for scraps. The solid colors make the patterning really clear, but it looks less like weaving than when you alternate between two colors.

Finally, we get to my current project. This is the first project where I had to do the side triangles (since the hats were knit in the round), and I was dreading it a bit. Turned out to be pretty easy to pick up if you are already familiar with entrelac. I was glad that I did a triangular piece first, though.

The current iteration is actually my 4th attempt to make this scarf. I started it in April with my own pattern that I wrote. It was essentially a basket-weave, but at a slant so that the scarf would be a trapezoid instead of a rectangle.
Scarf: first attempt
I was making it for my husband with a gradient yarn I spun on the wheel. I call it a gradient, but while it continually changes colors, there is some repetition, rather than just gradually going from one shade to another. But then I put it down to make the baby blanket and the baby blocks.

Even before I put it away I was not too fond of how it was coming out. The pattern turned out to be a lot of work to keep track of, but you could barely even see it with the color changes. And it was tight on the edges, so that it wouldn't be stretchy like you want in most knitted garments. But coming back to it a few weeks ago, I could finally let go and frog it.

Sometimes, you see something coming out badly, but you don't want to change course because you have already put so much effort into it. But when I came back, I realized that it was even worse than I thought before, and I had an easier time forgetting all of the earlier work. So I ripped it all out and started anew with a new pattern. I thought that entrelac would be a great way to highlight the gradient of a long change variegated yarn.

At first I cast on 25 stitches, for 5 squares of 5 stitches each. After a few rows of it, I realized it was going to be way too wide, so I started over. This time, with 20 stitches, for 4 squares of 5 stitches each.
Scarf: third attempt
It was coming out really nicely, but it was still a bit wide. That might have been ok, but I was running out of yarn (I weighed, and my scarf was going to only be 18 inches long).

Finally, I settled on 16 stitches cast on, for 4 squares of 4 stitches each:
Scarf: 4th attempt
Hopefully, this is my final version, though it will still be a bit short. This process though has really highlighted how different entrelac can come out based on the colors of the yarn and the size of the squares. Even though it is the exact same yarn, because the squares are different sizes, the scarf has a bit of a different feel each time I do it again.

You may have noticed that a square of four stitches means that with regular knitting I would have to be turning the work every 15 seconds. Luckily, I have learned backwards knitting of a sort. That means that instead of turning the work and knitting, I just start going the other way. It is great for entrelac or short rows, but works for any kind of pattern. I backwards knit or backwards purl, but switching between them is not very fast, so I don't use this technique for ribbing or seed stitch.

I thought I would try something new today though. Here is a video of me knitting forward, then backward. I figured it would be easier than trying to explain it in words or even pictures.


If you are wondering, yes, there was a baby in my lap for filming.


Sunday, August 6, 2017

Woolen Spinning

 Back in April, I dyed some roving that I was not a huge fan of. I was not much of a fan of the dyed version either: that "kelly green" dye is so bright! I feel like anything I knit with it will make me look like a crossing guard.
Dyed ramboullet roving in a bowl to dry
But I didn't want to waste it. It was my first time dyeing roving. Well, what do you do with fiber you don't like very much? Experiment and practice new techniques!

And this roving is getting that treatment twice. First, dyeing practice, then a new spinning technique: long draw.

For those of you who don't know, long draw is a technique where you pull the fiber, one-handed, away from the orifice of the wheel. In short draw, where your second hand is pinching the fiber so that there is no twist in the drafting area. In long draw, the twist goes into the drafting area. But the twist will travel to the thin parts of the fiber, so pulling on it will only draft the thicker parts (this won't work with long stapled fiber, or if the fibers are aligned - like with top). In short draw, you smooth the wool with your second hand, but in long draw you let it stay "fuzzy". This will create a woolen yarn - airy, fuzzy, and warm, with poor stitch definition.

Now, of course, the spinning I'm doing can't be a "true" woolen prep if I am not using rolags from my hand carders. But this kind of narrow roving is pretty similar, and the fibers are certainly not aligned like with top. I do think that it would be easier with rolags though: this fiber was really "sticky" and hard to draft, so I couldn't do a pure long draw either - I kept needing to tug on the roving with my second hand to free it. It probably doesn't help that my wheel has very little "pull", even after tightening it quite a bit.

My final tally was over 600 yards of long draw singles, and I was definitely getting the hang of the technique by the end. So, as a practice yarn, it was a success. How did it come out as a yarn for knitting though?

300 yards 2-ply woolen ramboullet yarn
It could be a lot worse. 

Looking at the singles, there were several parts of the color that I really liked, and it might have come out better if I had left out the yellow dye. The yellow just made the neon problem in the green worse.
Singles on the bobbin
When I was about to ply, some of the color was so nice that I was tempted to just do an n-ply to preserve the color progression. But the yarn was pretty uneven, which would only be exacerbated by an n-ply. And I was hoping that the uglier parts of the color progression would be tamed by the prettier colors.
2 full bobbins, ready for plying
I don't know how successful that was. It is so hard to tell in the skein. I guess I'll have to wait until I knit it to see if I like the finished product.
Blending colors at the beginning of plying
The end of the second bobbin of plying


Sunday, November 27, 2016

Technique: Stranded Knitting

I haven't started yet, but coming up, I will be doing blue detail work on the shawl with stranded knitting. It's been awhile since I used that particular technique, because I usually prefer my work to look good on both sides (and I hate the way stranded knitting looks on the back). But, this piece of the shawl will be sewed so the back doesn't show. Time to review tips!

While I was home for Thanksgiving, I hunted around for old pieces that I didn't have pictures of so that I could show you all some early attempts. It's always nice to see how far you have come. Actually, both things I found were hats with stranded knitting that was too tight. I made both in high school.

First up, a hat made from a vintage pattern, from before I had any style:
Pattern from Jill C. Weiner: Side view
Back view
I vaguely remember picking the pattern because it was one of the ones that the book listed as "hard" and I wanted to challenge myself. Except for being an ugly pattern, it came out mostly ok, and has improved over time as the yarn stretched. However, at the time, I did not know how to do stranded knitting at all, and the hat has very long floats on the pink squiggly in the middle (as well as being too tight in that section). First tip: be sure to carry the non-working yarn along with you by twisting it with the working yarn every 3 to 4 stitches. This ensures short floats on the back that won't snag so easily.

Ok, second example. In high school, I made a bunch of berets from a basic pattern I had. Once, I decided to make it fancy by adding stranded colorwork of my own design:
A beret of my own design, from high school
Well, the pattern came out ok, and I would do it again -- though that light blue really clashes with the other colors: what was I thinking? However, although I carried the non-working yarn this time, I made it far too tight, and the beret puckers up, and won't lie flat. The shape is really weird. So, second tip: Make your floats twice as loose as you think they should be. Better too loose than too tight. 

Well, getting into college, I tried again. This time, for a Valentine's Day gift swap:

Heart hat
 The knitting is plenty loose, but this time I made a different error: I assumed that knit stitches are square. I drew hearts on graph paper and transferred the pattern faithfully to the hat. But, since the stitches were rectangular, my hearts came out far too wide and ended up looking like bats. So, third tip: if making your own pattern, account for the fact that knit-stitches are rectangular. There are three different ways to account for this. The hardest is to knit a swatch and measure it. Use the number of stitches per inch both horizontally and vertically to see how your pattern will stretch, and compensate. The other options are to buy knitting pattern graph paper at a knitting store, or to use a program like I do now, which automatically stretches the pattern after you have sketched it.

Ok, final example. I really haven't used the technique much, so this is what I have:
A hat made on commission for a co-worker
This one came out looking great, actually (though I made a rolled-brim hat for a guy, for some reason). The only thing was that off was that, because I made the hat in the round, I had to float the red across the entire back of the hat. So, final tip: if you are only putting the pattern on one part of the piece, do flat knitting and do intarsia instead.


Monday, January 11, 2016

Felting

Felting is funny: it means so many different things.

When we were kids, most of us did crafts with felt - in premade sheets. All you had to do was cut it in the shape you wanted, and it could be used as a stiff fabric or like textured paper. I think I still have a little pillow somewhere make out of those sheets and stapled together.

There is also needle felting. I don't do that craft, and I know very little about it, except that they sell the cutest little kits at Maryland Sheep and Wool festival.

When you are processing fleece, especially fine fleece, felting is the thing you live in dread of. Just a little too much agitation, or the wrong temperature of water, and a beautiful bit of wool becomes unspinnable.

Then there is the felting that knitters do, although it is technically "fulling".

Fulling a knitted fabric shrinks it and removes stitch definition. It smoothes out the fabric, and stiffens it. It often makes it warmer as well, thickening it and shrinking the holes. You can full the fabric a bit, just to make it more form-fitting, or a lot, to make it closer to a true felt.

In general, felting or fulling only works with animal fibers, particularly wool. Agitating and/or temperature changes cause microscopic "hooks" in the fibers to catch on each other.

All of this is to say that I experimented with a bit of fulling recently, and I may be doing some more soon.

I made some felted dryer balls to use up some waste wool and ugly yarn. They supposedly make the dryer more efficient and possibly soften the laundry without chemicals.

I used two different handspun yarns that were fairly ugly, a green single-ply and a yellow two-ply:

yellow 2-ply

The green yarn was so bad I didn't ever take a picture of it. Here some of the fiber it was made from.

The green was made from coopworth wool combing waste, while the yellow was made from commercial top from an unspecified breed of sheep.

I made identical balls from the two yarns, and fulled them in the dryer (so much easier than the old fashioned way):


From left to right: an unstuffed "case"; a pre-felted ball; and a post-felted ball
Although the balls were the same size initially, the green balls felted much smaller, and were much more compact, and also less "squishy".


Some possible explanations:

  1. I stuffed the green ones with more fiber
  2. The fiber that I stuffed the green ones with had the lock structure broken apart, which made it felt better
  3. The single-ply felted easier than the two-ply
  4. Unbeknownst to me, the yellow wool is a super-wash wool (the "hooks have been chemically removed so that the wool won't felt)
  5. The yellow yarn is thicker, so it couldn't shrink as much
  6. Any or all of the above