The sweater is progressing. It's been a long time since I made a sweater (I've only ever made three), and it makes me remember why I prefer short projects. The time between the planning and the payoff is loooong, and there is a lot of time just doing simple stitching. Since I'm not a student anymore, and I don't do many conference calls, I don't have a lot of time when I want to be doing simple stitches. When I'm knitting on my commute I want to be entertained!
Sweater currently: no sleeves, no collar, no bottom. But top and middle are finished.
All that said, I'm pretty pleased with how it is coming out. The only thing I am worried about is that the yarn is pretty loosely plied. I knit English-style, which tends to loosen plies even further. It looks fine now, but who knows how it will wear - it's a pretty soft yarn. It's a lot of work for a sweater if it will look awful in a year.
I've had some problems with soft yarns in the past. Here is my (award-winning) merino brioche hat when it was new in 2015:
Brioche hat in 2015
And now:
Brioche hat in 2019
The merino wool is very soft, but it doesn't hold up to heavy wear. I've worn it for several winters, and it is pilling, stretching, and shedding. But it is still warm, and still pretty. So I'm going to keep wearing it.
This inspired me to look around to see what else I could find around the house. A couple looked pretty good, but they had stretched a bit.
My first pussy hat, made with acrylic eyelash yarn, made in 2017 and hardly worn
A slouchy beret in blue and purple, made in 2008.
One had shrunk, so that I don't really wear it anymore:
Red and blue reversible hat, newly made in January 2012.
Reversible hat in 2019: smaller (it no longer covers the tops of my ears), and pilling.
Other items were just looking worn - pilling, shedding, woven-in-ends pulling out:
Lap blanket made in 2005. You can barely see the stitches from all of the yarn halo. I have also had to resew the panels together several times.
Astronomy hat finished in early 2016. My husband wears this a lot, so it is already pilling.
Baby blanket finished November 2017. It's not that old, but the yarn was loosely spun and slippery, so it is already showing a prominent halo of shed yarn. Woven ends are coming out too, because it is so slippery.
One scarf is made of rougher wool (coopworth) so it is not shedding or pilling. But... I made it using a slipped stitches pattern. It has curled a lot, and I don't bother trying to straighten it.
Scarf made from my first real handspun in 2014. Nice and blocked (though the yarn is uneven).
Same scarf in 2019. No pilling, but it has curled up into a tube.
Of course, all of these are survivors. We all have a tendency to lose things, even hand-knitted things (especially my husband). So, here's to a hat that has gone into the void of lost items: all we have is the picture. I hope it is keeping someone's ears warm, somewhere.
Reversible hat, finished in December 2011. Residing somewhere else in 2019.
Reversible hat, other side.
It is a nice reminder that the life of our projects is only beginning when we take them off the needles. A "finished" project is anything but.
Our daycare provider tells my husband (who usually does pick-up) that our baby's hands are cold when they go outside to play. Last winter he was immobile enough to just put a blanket over him. This winter, I guess we will need mittens.
Of course, we'd have to trek to a specialty store to get anything in his size. And I want to attach a cord so that he doesn't lose them when he inevitably hates them and takes them off (as he does to his socks). Online options look overpriced... I guess I'll make him a pair.
Luckily(?) I have a sick day that involves lots of trips to the bathroom but not actually feeling that sick. So, I cast on a pair of mittens to occupy myself, and manage to finish by the end of the day.
Well, I won't leave you in suspense, they come out looking like this:
Pair of red mittens with cord. Quarter next to them for size.
I made them out of a ball of mystery yarn that I have had in my stash forever. I found it under a bed in a hotel room in Israel in 2005. Burn test shows it to be wool, and it is a pleasing barber pole of reds, browns, oranges, and a bit of blue. I found it in a ball, so I actually don't know the full extent of the color changes - for all I know, it's green in the middle!
Pattern notes: It might look a bit better if I used a smaller set of needles for the initial ribbing. I did a longer ribbing than the pattern called for, which will hopefully keep the mittens on NEB's hands longer. And I liked the instructions for the i-cord: simple and to the point.
I haven't made mittens in awhile, but I had quite a glove kick my freshman year of college. I only found pictures of 3 pairs, but I'm pretty sure there were a few more than that.
Blue mittens with white stripe made for charity, made in 2005 or 2006
Self-striping sock yarn gloves in crazy colors. Made for my cousin in 2006.
Sparkly black fingerless gloves. Also made in 2006.
Gloves are a great project for people who really like socks but want to do more fiddly bits. Even the mittens can get a bit fiddly with all of the needles and stitches on holders. I would not recommend magic loop as an alternative to double pointed needles if you are making gloves - there are just too few stitches on each finger.
Almost finished with the main part of the baby mittens.
Stitches on three double-pointed needles, thumb gusset on a stitch holder.
Anyhow, I finished up the mittens in one day and NEB has been wearing them. Not sure why I bothered to put thumbs on them though, since he hasn't figured out how to use that part of the mitten.
Man, who knew a baby would take up so much time? Definitely not updating this space as much as I would like. But between taking care of NEB, being sick, and helping campaign for the midterms (if you live in the US, you should make sure you are registered to vote, ASAP), I haven't found the time.
In fact, I've only been doing a bit of crafting here and there. I am almost finished with my lace shawl. No, I did not get it in for judging at the state fair. In fact, I have three more rows to go before I can start weaving in ends and blocking. But it is going to be beautiful, and I hope the intended recipient loves it!
Speaking of the state fair, I didn't do as well this year as in previous years. I think that is because more people are submitting - so I don't have any complaints! My entrelac scarf didn't place (lots of competition in the "scarf" category), and my lace prayer shawl got third for the category of handspun shawls. It also got a presidential ribbon though, so someone liked how it looked.
Other than the lace shawl, I've worked on a couple of quick projects in the last month or two. Both of them would fall into the category of "decorations," I guess, which is not something I usually dabble in.
The first project was for the Jewish holiday of sukkot. Most of the details of the holiday don't matter, except that we build a hut (sukkah), usually with cloth walls, and branches for the roof. It's traditional to decorate the sukkah, either by hanging harvest products from the ceiling, or making garlands.
Last year I attempted to make popcorn strings. They were... ok. But they were dried out by the end of the holiday, and they didn't look too good after getting rained on. This year I thought I would put my fiber arts skills to good use and make garlands out of yarn.
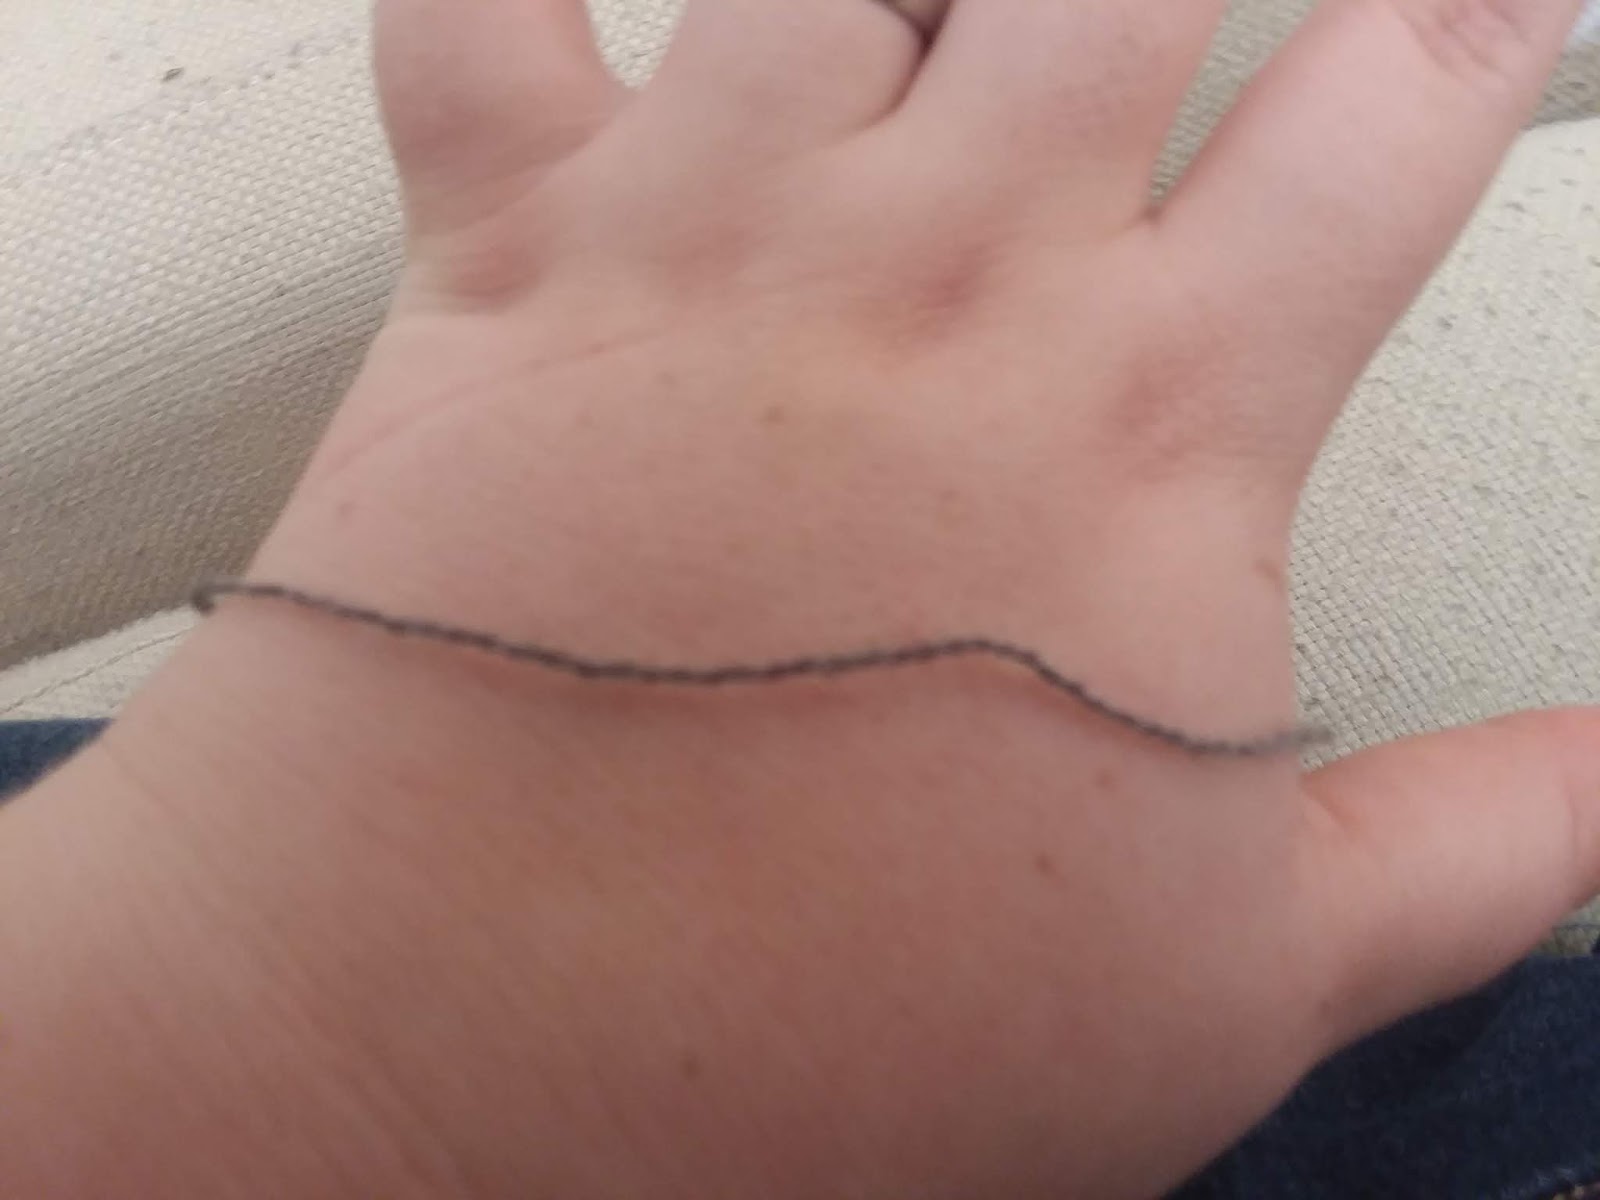
I used a technique called finger knitting. Basically, you treat your fingers as a knitting jenny/knitting loom. There isn't much variety in the stitching, but you can make a long chain in whatever color suits your fancy. And it is quick, and doesn't require any tools except the yarn itself. When I taught knitting at a day camp, they would send me bunks of campers who would have 45 minutes to learn how to do something with yarn. And I would usually teach them finger knitting. Their finished products, depending on how long they were, could be bracelets, necklaces, belts, or jump ropes.
Me, hand knitting a garland for the sukkah
Anyhow, I wanted nice long chains that I could hang up in my 8 foot cube of a sukkah. It was a great way to use up yarn that I wasn't too fond of, particularly stuff that I thought was too loud. Nothing is too loud when hung from the ceiling outside.
I ended up with three long chains. The first was a pale yellow yarn paired with a fall-colored variegated yarn that was supposedly one of the color pallets from World of Warcraft (I don't play, so I can't attest either way).
WoW yarn used in garland #1
The other two were other loud, bulky yarns that have been sitting in my stash forever. I'm pretty sure I have posted about them before, in my post on ugly yarns. The pink yarn was paired up with a black sparkly yarn that is nice, but a bit scratchy for clothing.
Unknown ugly pink/blue/orange yarn
Black sparkles yarn
Any how, all three garlands looked great hanging up, and I should be able to reuse them next year. My husband suggests that I add one more each year. We'll see how long that works out. It is a great way to use up yarn.
Garlands hanging from the roof of the sukkah (view looking up from below)
Garland at entrance
The second decorative art project is for little NEB's Halloween costume. He is going as an acorn, and I wanted some oak leaves as accessories. Ravelry is amazing. I just typed in a search for oak leaf patterns and a few came up. I ended up making a pattern by Frankie Brown that was pretty perfect.
Knitted oak leaves for costume, in brown and red
I made them on size-9 needles, with two yarns held together, so they came out bigger than the pattern (which is on size 6). The larger one is red and light brown, and the smaller one is dark brown and the same light brown. The plan is to tie them on as an arm band.
That's all for now. Maybe I'll write again before 2019.
Sigh. Started another project without much thought or advance planning. Then I (rather foolishly) told the Maryland State Fair that I would be submitting it for judging. So now I have a bit less than three weeks to finish it.
All that said, it is coming along beautifully. It is a lace shawl, and I am actually following a pattern (no really, the only change is to the yarn. Well, and the needle size. But, the rest, I swear, is following the pattern). The pattern is Ilo, by Heidi Alander. It is a two-color, triangle lace shawl using something akin to the feather and fan stitch.
For my main color, I used some rough handspun. I spun from the lock, and I mixed mostly white lincoln wool with colored mohair locks in pink, purple and blue. It came out quite pastel. You can read more about it here, here, and here.
Mohair locks
Lincoln locks
Singles yarn on the spindle
Pastel yarn in the skein
For my contrasting color, I used a gray yarn that has been sitting in my stash for awhile. It is either laceweight or cobweb weight, and I once made a lace shirt out of it.
Fine gray yarn
It is a mystery yarn, since I bought and balled it before I documented every purchase on Ravelry. I think I bought it in college though, and I know that I got it from a vendor at the science fiction convention Arisia. It feels like wool. It is VERY fine, and quite delicate. I am doubling it for this project, to more closely match the weight of the other yarn.
Yarn across my hand, for scale
So, the project started out well.
Beginnings of the shawl, with balled yarn
I was a little worried that because the shawl is a triangle, the blocks of color would look odd: early on, the blocks would be large, but later they would be narrow. So far though, that hasn't happened. It looks fine, I think.
Current state of the shawl, as of Aug 5th
What has happened is that I have discovered that one of the balls of the gray yarn has gotten damaged. I don't know what caused it, but there are many breaks in the yarn. This means that I have to splice a new thread every row or two. An unpleasant surprise, to be sure, but not insurmountable.
Well, since I have some baby-free time today, I should be knitting, not blogging! Off I go.
Currently working on a scarf using entrelac, so I think I will talk about entrelac today.
Entrelac means "interlaced" French. It is a technique that can make a very nice "woven" texture if done tightly, and a pleasing checkerboard if done loosely. But I'm not going to teach how to do it here. There are much more qualified teachers online, and I encourage you to find either a video or written description and try it out.
Here I am going to talk about two things: how entrelac is a great technique to play with colored yarns, and the importance of learning backwards knitting if you want to do very much of it.
I have done a few projects using entrelac. The first one I tried was a large triangular shawl in 2012. The nice thing about doing a triangle with entrelac is that you don't have to do the side triangles, so there are almost no short rows. I knit it loosely, starting with 25 squares of 10 stitches each. There wasn't much of the entrelac texture, but I liked the checkerboard pattern it made.
Entrelac shawl from 2012 in black and blue
My friend modeling the shawl
I made the shawl with sock yarn on size 6 needles. Notice how the technique is a good way to highlight a variegated yarn with short color changes. The solid color makes the variegated color pop, and the small squares allow you to have color pooling in a large project.
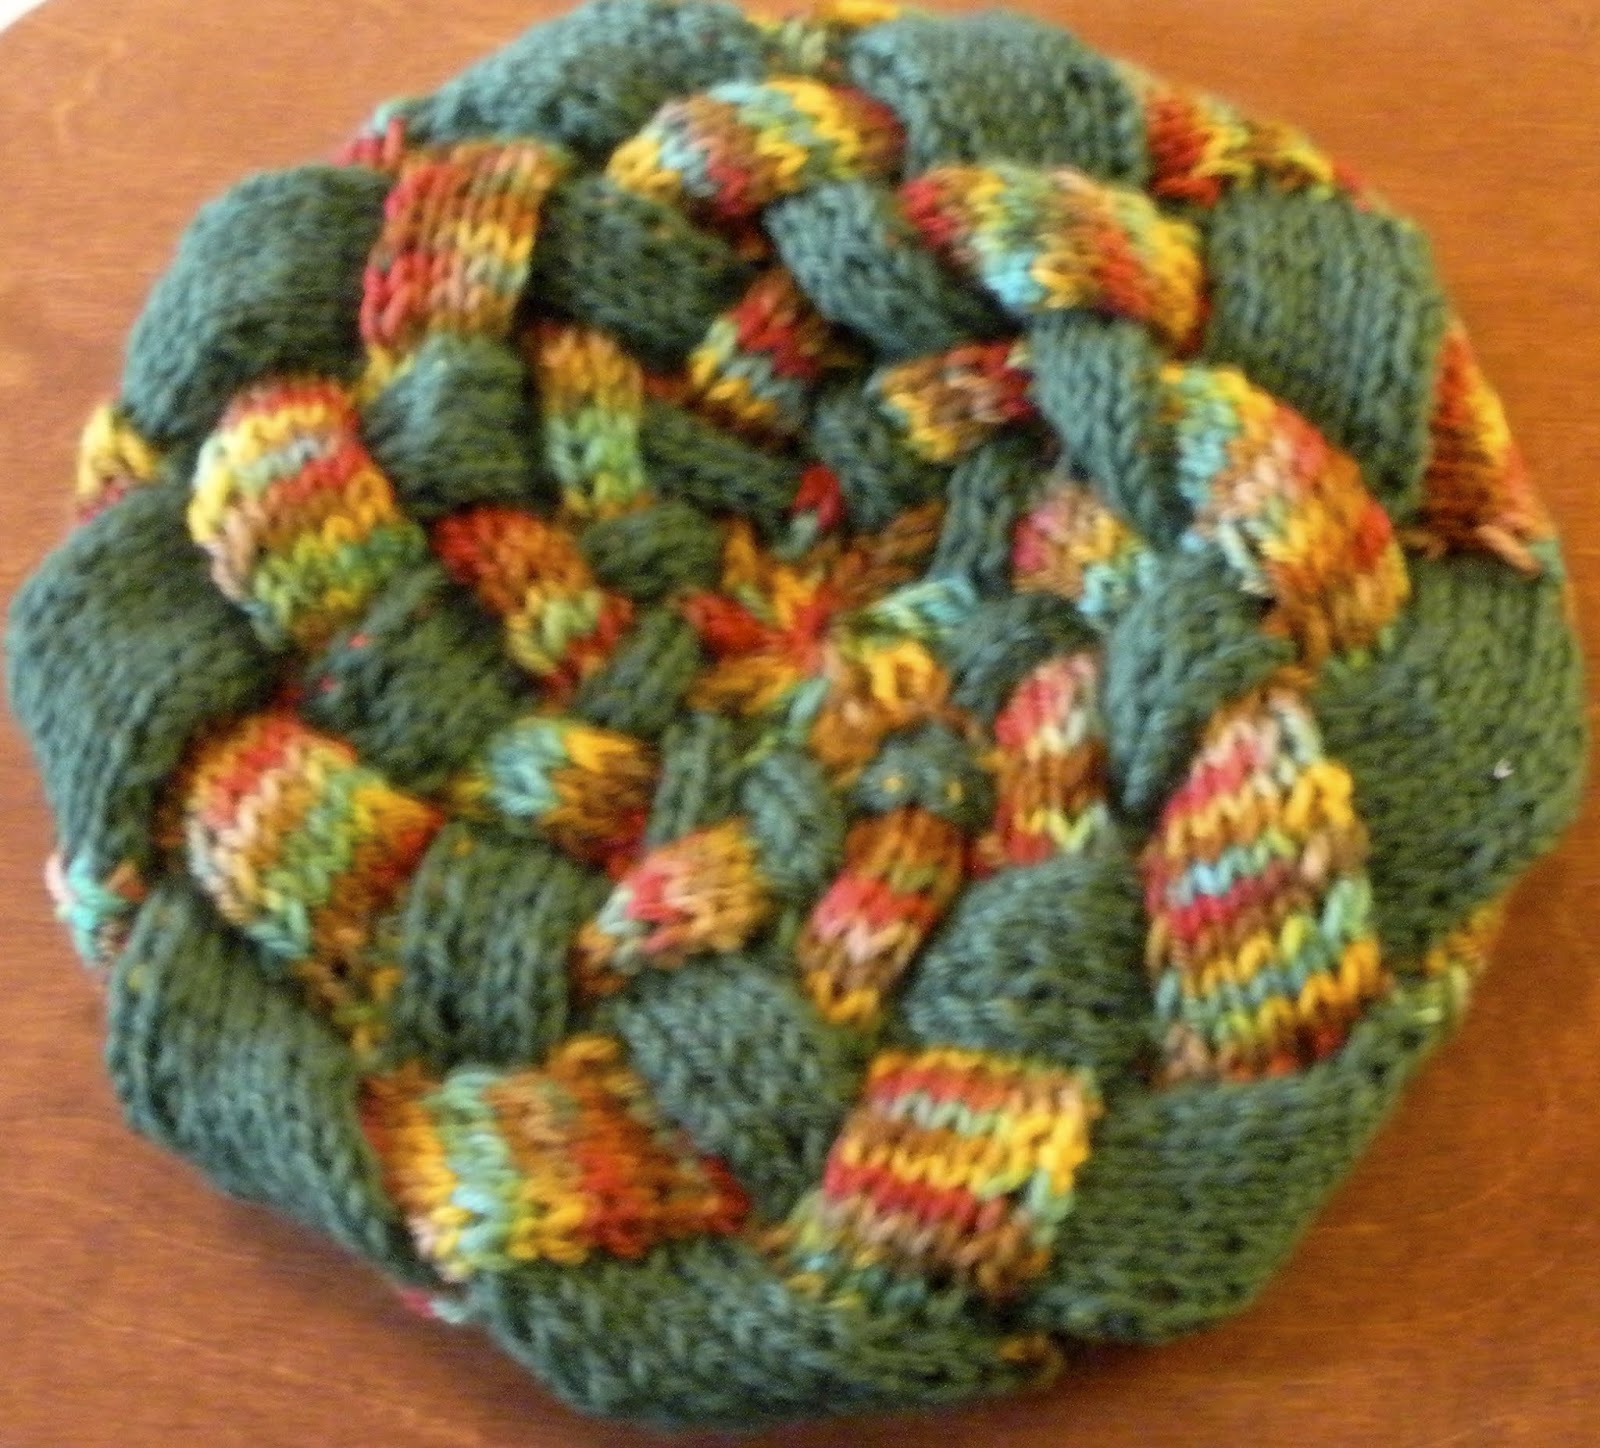
I also made an entrelac tam with a similar set of yarns, although this was knit tighter, and with thicker yarn:
Entrelac tam in green and multicolor
Notice that with the smaller needles relative to the thickness of the yarn there is a significantly tighter knit, and that the interlacing is more pronounced. But again, alternating between squares of a solid color and a multi-color yarn with a short repeat highlights the multi-color nicely (even if, as in this case, the yarn has so many colors it might derisively be labeled "clown barf").
I also made a similar hat without the solid color.
Entrelac tam in shades of blue
This time, although the texture similarly comes through due to the tight knitting, the variegated yarn by itself confuses the eye. It is no longer so clear that it is an ordered interlace. I also want to highlight that this is a slightly longer color repeat, so that most squares are pools of one or two shades, rather than the hodgepodge of the previous yarn.
One final tam. This one was made with only solid colors.
Entrelac tam in black, green, blue, grey, and white (side view)
This one highlights that entrelac is a great vehicle for scraps. The solid colors make the patterning really clear, but it looks less like weaving than when you alternate between two colors.
Finally, we get to my current project. This is the first project where I had to do the side triangles (since the hats were knit in the round), and I was dreading it a bit. Turned out to be pretty easy to pick up if you are already familiar with entrelac. I was glad that I did a triangular piece first, though.
The current iteration is actually my 4th attempt to make this scarf. I started it in April with my own pattern that I wrote. It was essentially a basket-weave, but at a slant so that the scarf would be a trapezoid instead of a rectangle.
Scarf: first attempt
I was making it for my husband with a gradient yarn I spun on the wheel. I call it a gradient, but while it continually changes colors, there is some repetition, rather than just gradually going from one shade to another. But then I put it down to make the baby blanket and the baby blocks.
Even before I put it away I was not too fond of how it was coming out. The pattern turned out to be a lot of work to keep track of, but you could barely even see it with the color changes. And it was tight on the edges, so that it wouldn't be stretchy like you want in most knitted garments. But coming back to it a few weeks ago, I could finally let go and frog it.
Sometimes, you see something coming out badly, but you don't want to change course because you have already put so much effort into it. But when I came back, I realized that it was even worse than I thought before, and I had an easier time forgetting all of the earlier work. So I ripped it all out and started anew with a new pattern. I thought that entrelac would be a great way to highlight the gradient of a long change variegated yarn.
At first I cast on 25 stitches, for 5 squares of 5 stitches each. After a few rows of it, I realized it was going to be way too wide, so I started over. This time, with 20 stitches, for 4 squares of 5 stitches each.
Scarf: third attempt
It was coming out really nicely, but it was still a bit wide. That might have been ok, but I was running out of yarn (I weighed, and my scarf was going to only be 18 inches long).
Finally, I settled on 16 stitches cast on, for 4 squares of 4 stitches each:
Scarf: 4th attempt
Hopefully, this is my final version, though it will still be a bit short. This process though has really highlighted how different entrelac can come out based on the colors of the yarn and the size of the squares. Even though it is the exact same yarn, because the squares are different sizes, the scarf has a bit of a different feel each time I do it again.
You may have noticed that a square of four stitches means that with regular knitting I would have to be turning the work every 15 seconds. Luckily, I have learned backwards knitting of a sort. That means that instead of turning the work and knitting, I just start going the other way. It is great for entrelac or short rows, but works for any kind of pattern. I backwards knit or backwards purl, but switching between them is not very fast, so I don't use this technique for ribbing or seed stitch.
I thought I would try something new today though. Here is a video of me knitting forward, then backward. I figured it would be easier than trying to explain it in words or even pictures.
If you are wondering, yes, there was a baby in my lap for filming.
I know I've been pretty negligent about keeping you up to date on current projects. Partially, that's because I haven't been doing much. But also, once I've started a project and not talked about it for awhile, at some point it just makes sense to wait until it is finished before saying anything. So I will make a nice long post today on something I have been working on since November and just finished up.
After I finished the blanket I was making for our little NEB, I wanted a project that a) was also for the baby, b) wasn't a particular size, c) they wouldn't need right away, in case I didn't finish before they were born, and d) didn't require much thought. I decided to make a squishy toy, but shaping an animal or person doll would require a pattern - too much thought for distracted, pregnant me.
I ended up deciding to make squishy blocks. Cubes wouldn't require much shaping, and I could make as many or as few as I wanted (I ended up making 3, but 1 1/2 were completed after NEB was born). I could make them all garter stitch or stockinette, but that was a little too easy for me, and I thought I would get bored.
So - pattern sampler blocks. This is mostly my own design. Each one started with a 25 stitch cast on size 3 needles. I would do two rows of knit, followed by a pattern of 21 stitches (with two knit stitches on either side). I would continue the pattern until I had a square, then finish with two more rows of knit. I would then switch to another color, and make a similar square with a different pattern. After I had finished 4 squares like that, I would cast off.
Then, because I don't like sewing, I picked up 25 stitches along one side and made another square. On the edges of the square I would pick up stitches along the sides, but I could just have easily seamed it later.
When I had six squares, I stuffed it with wool and sewed it up (a foam cube would probably have been better, but I have a lot of crummy wool available for stuffing). After it was stuffed, I attempted to felt the wool with a hot bath followed by a cold bath. I don't know if it did anything - I was mostly just hoping to make it a little more cube-like.
Well, I'm probably not describing it very well. Here's a picture.
One block, after soaking.
So that's the block part. Onto the sampler part. Across the 3 blocks I had a total of 12 patterns - 3 on the first two and 6 on the third. Incidentally, the yarn for these blocks were some leftovers that my mother-in-law gave me from a pair of dresses she made for my little nieces. It's acrylic and I have 5 colors - white, blue, green, pink, and lavender. Because I started this before I knew the sex of the baby, and I didn't want it to seem too gendered, I made one block in boy's colors (green, blue, and white); one in girl's colors (pink, lavender, and white) and one with all of the colors (two white panels and one, each, of all of the others).
I had two requirements for the sampler patterns: 1) nothing fancy, since I didn't want it to bunch up weirdly - only knits and purls; and 2) it had to look good in 21 stitches. To the patterns!
Block #1 - "boy's colors"
Green was a simple basket weave:
Block #1, green basket weave - picture taken before stuffing
The pattern went as follows:
===vvv===vvv
===vvv===vvv
===vvv===vvv
vvv===vvv===
vvv===vvv===
vvv===vvv===
with v meaning a knit on the right side and a purl on the wrong side, and = meaning a purl on the right side and a knit on the wrong side.
White was a diagonal rib:
Block #1, white diagonal rib- picture taken before stuffing
Whew! That was quite a lot of patterns. Maybe I should have updated while I was working on the project rather than at the end. Oh well, I hope you were inspired to explore more of what knits and purls can do.
Next time I hope to update you on my spinning, or maybe the scarf made from handspun for my hubby.