header picture

header picture

Sunday, July 30, 2017

Sheep to Shawl: Part VII

Whew! It's been awhile since I posted! I've been resting my shoulder, taking it easy, and working to finish up some big projects. Well, I did start a bit of spinning on my wheel, but I'm waiting until it is finished to do a full write-up. For today - I've (almost entirely) finished my shawl I started spinning just a bit more than two years ago.

If you are interested in my progress up to now, in Part I I covered washing the fleece, in Part II I covered prepping it, in Part III I covered spinning singles, and in Part IV I covered plying and finishing the yarn. In Part V I covered starting to knit the shawl and in Part VI I covered the detail work that I did for the neck band.There have also been two other progress reports on the shawl here and here.

Today I will cover all of the little finishing touches that it takes to complete a shawl. I weaved in the ends, blocked it, reinforced the "button" holes where I will be tying on the tassels, and sewed on the neck band. I still have to tie on the tassels, but since that is a religious task, I figured it was outside the scope of this blog.

First, I needed to finish knitting it. It looks about the same as it did the last time I showed you a picture, just bigger:

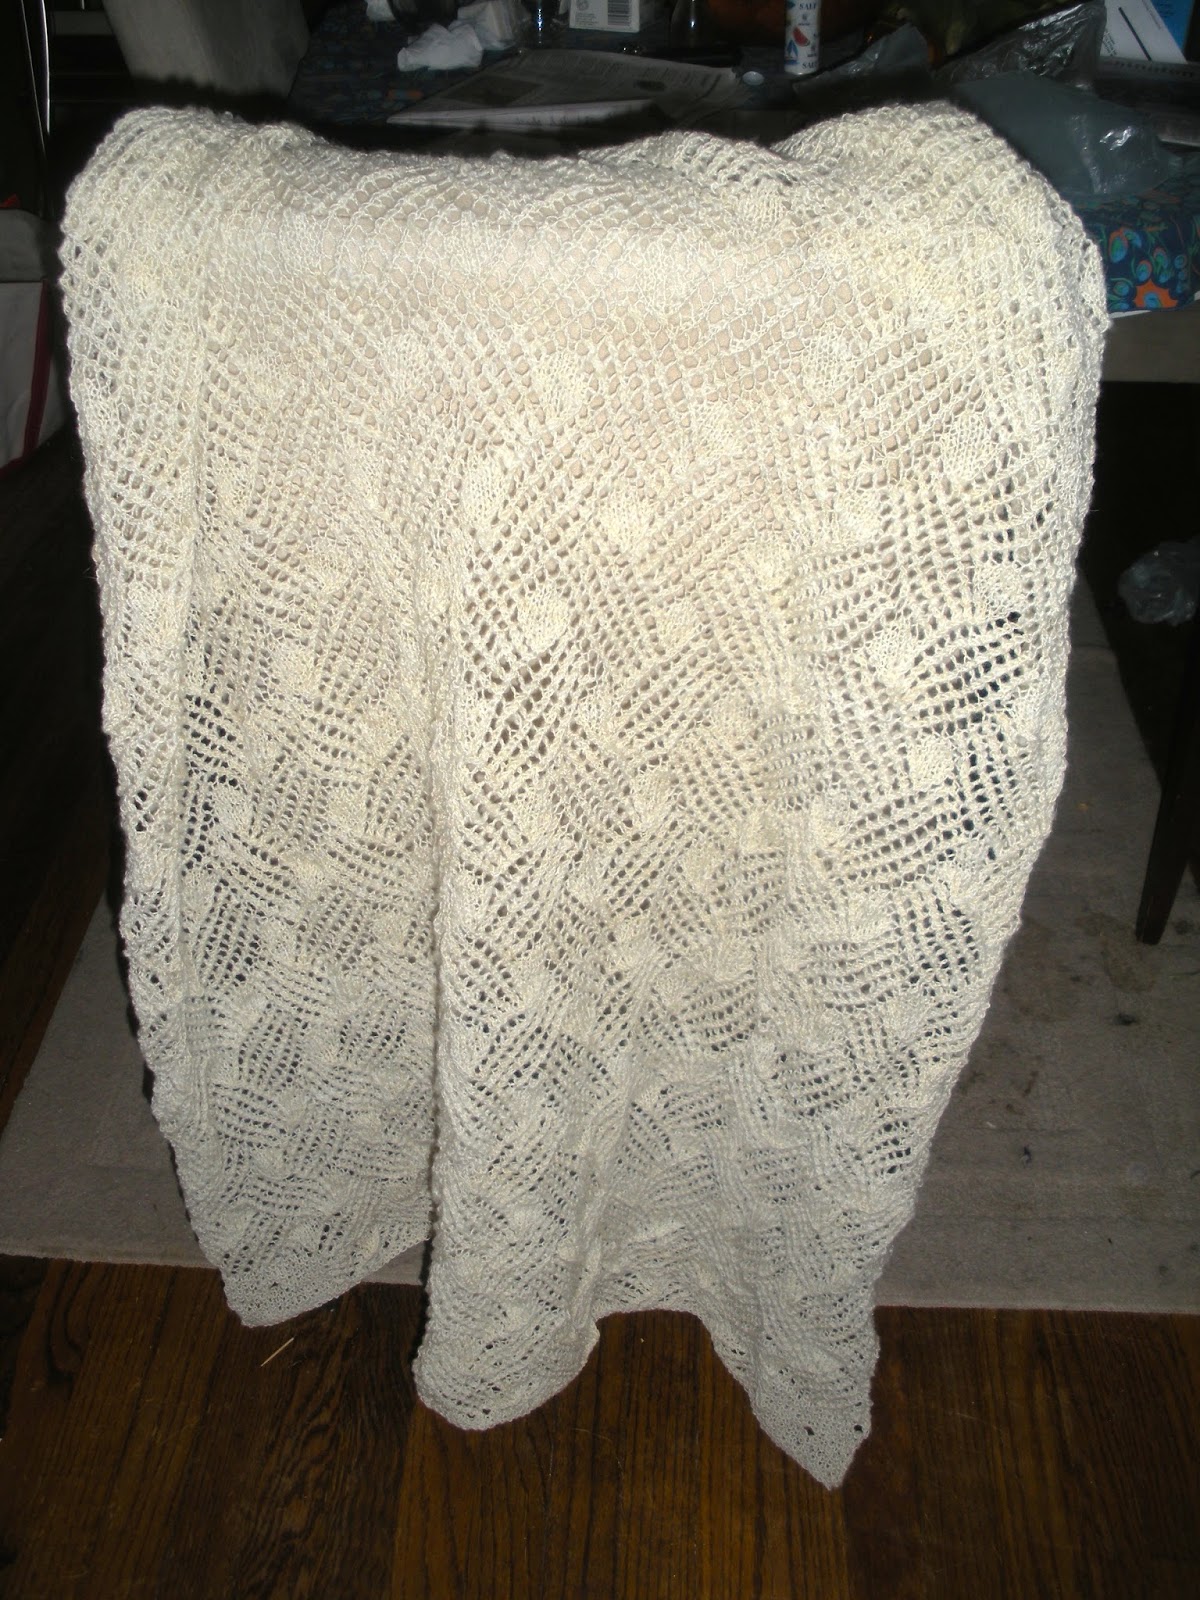
Finished shawl, before blocking
After casting off, I spent a bit of time weaving in ends. Because there wasn't any colorwork, the only ends were where I switched skeins, and where I had to make spinners knots (because my singles snapped while plying). I find that the easiest way to weave in ends is just to do a duplicate stitch for a bit, then snip off the rest. If the remaining end is long enough, I use a darning needle. If it is too short, I use a crochet hook. Either way, after a few stitches, it is very unlikely to come undone.

Next, it was time for blocking. In the past, I have just used t-pins on a towel for all of my blocking, or just the towel for a light blocking. 

But I wanted this to come out very rectangular and even, and it is very large. I had heard good things about blocking wires, so I figured I should try them. I also bought some interlocking foam mats to pin to. 

The mats I bought come in sets of 9, and can be arranged in any configuration. This gives them more flexibility than a blocking board - if I had a 6-foot scarf, I could block that by setting them up end-to-end. They also store easier. I got two sets of them, but 18 still wasn't large enough to completely block this very large shawl, and some of the t-pins were pinned to the floor.

Interlocking foam for blocking surface - not quite large enough
The blocking wires were really easy to use, but 1) they weren't quite large enough for the whole shawl, so I had to overlap them and 2) setting them up with the damp shawl on my lap was quite tedious. They did give a nice even block, even if I only used them on the sides of the shawl.

Damp shawl stretched out and pinned to the foam blocks
When it was dry, I pulled it up and took out the wires. This part was quite easy.

Next, I wanted to reinforce the holes that I left to tie the tassels onto.
Corner of the shawl, with hole for tassel
I saw several options for reinforcement. The most common was whip stitch, but I wanted something really strong. There was also blanket stitch, but that looked like it was more to reinforce a hem than for a small hole like a button. I ultimately went with buttonhole stitch. It makes a series of knots around the edge of the hole, which are less likely to fray. And it is called buttonhole stitch, so it must be good for buttonholes.
Reinforced hole for tassel
After watching a video, I picked it up pretty easily. It's always good to have another tool in the toolbox, even if I don't make things with buttons very often.

The last bit of finishing was to sew on the neck band. I folded the shawl and the band in half and pinned it, so that it would fall in the right place. I used the t-pins to pin it up and down, because sewing on a stretchy fabric without bunching up is tricky.

Neck band, pinned and ready for sewing
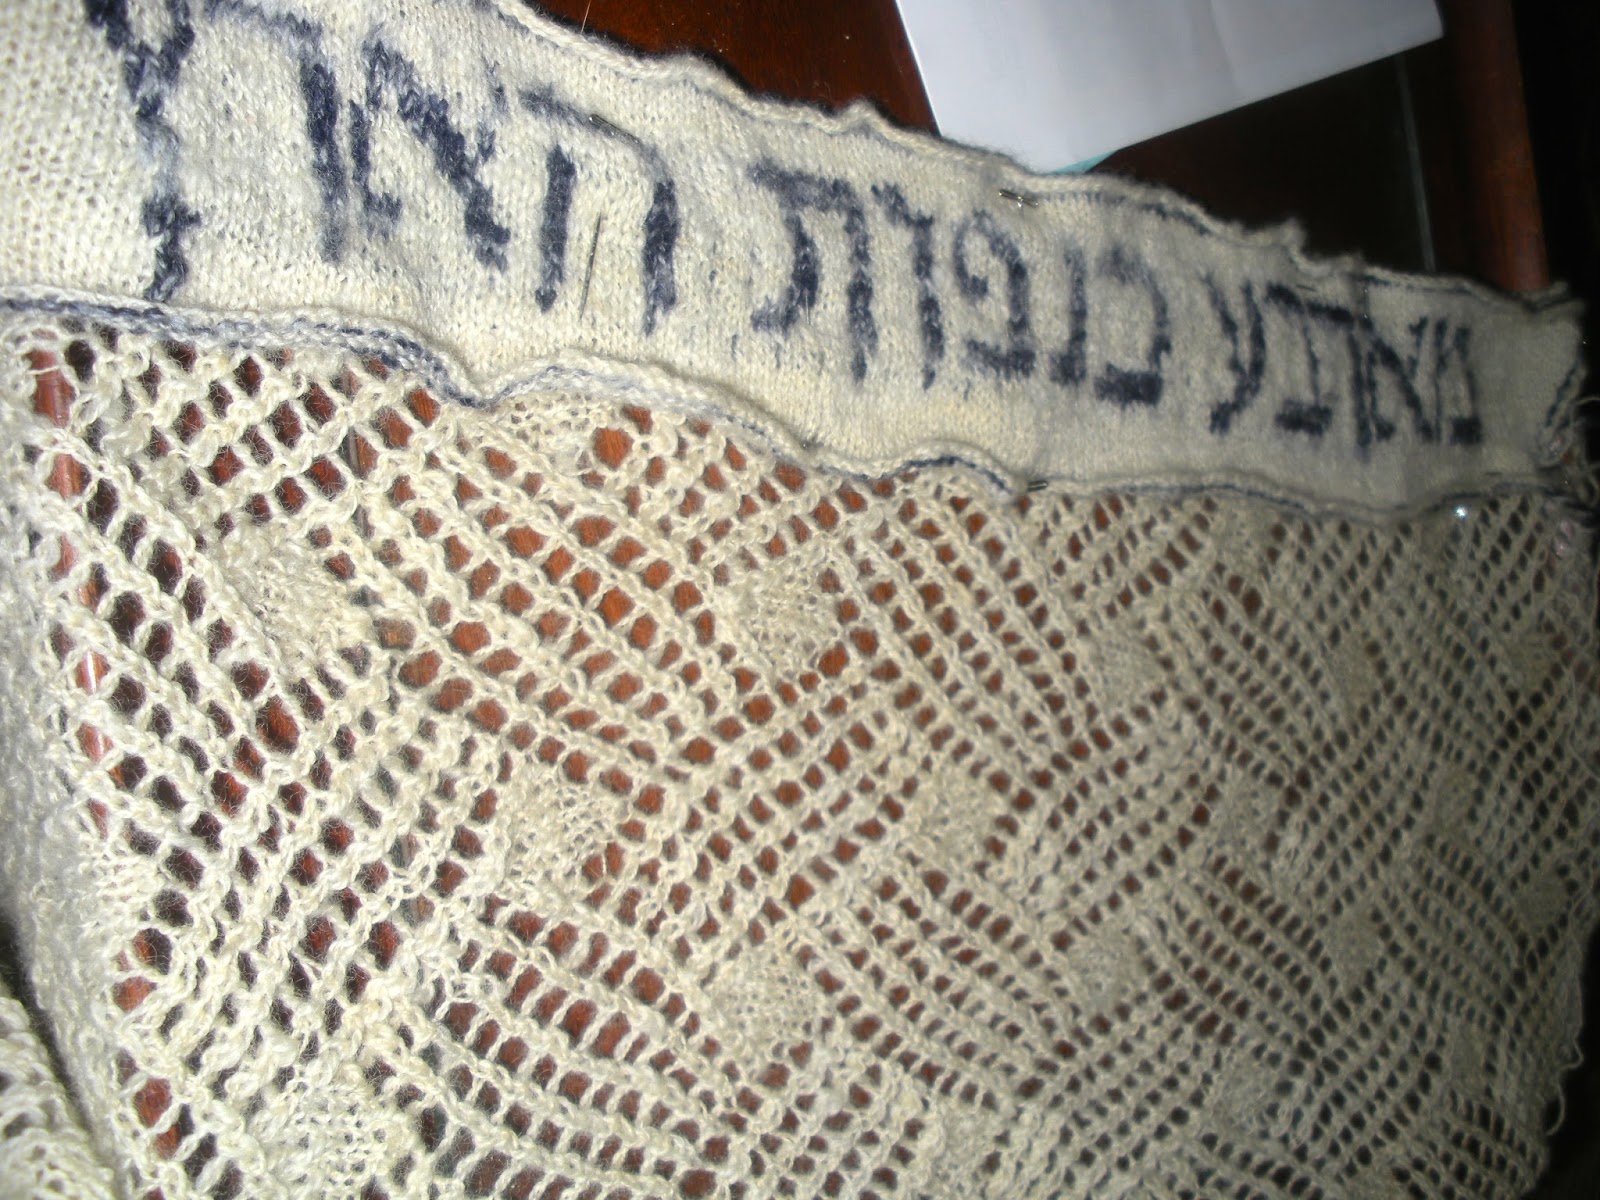
Then I just used some more of the same yarn for whip stitch all the way around. Unfortunately, it seemed to be sagging and uneven, but I was able to mostly fix it by lightly sewing around the letters.
Neck band, all sewed on, mostly evenly
All that is left is to tie on the tassels! I am so excited to have this shawl. Remember, it started out with this:
Leicester sheep
Which became this:
Locks of leicester wool
Before I spun it into this:
Strands of yarn, with quarter for scale
Finally, after many months of work, I have this:
Shawl, being folded as it is meant to be worn, on my shoulders.

Sunday, May 7, 2017

Maryland Sheep and Wool Festival 2017

Currently in sensory overload. We saw so many bright colors at the festival, so many textures, touched so many soft things. Basically, by the end we were starting to get indifferent to beauty. That's when we left.

This is pretty much my mind right now
I went to the annual Maryland Sheep and Wool Festival with my mother-in-law, who knits and crochets a bit, but doesn't spin. This will be my fourth time going - I missed last year because I was graduating. This year we got to the festival at around 10:30 (two hours after opening) and it was drizzling and cold. The rain eventually let up, but it was still pretty cold when we left at 4.

The first place we went was the fleece sale.
Fleece Sale
Grouped into categories, they had bags of fleeces on tables, with a tag giving the type and other details, and stickers indicating whether they were Maryland local sheep and whether they were from 4-H. The fleeces that won ribbons had been auctioned off the day before - we were picking through the ones that weren't submitted for judging and the ones that didn't win. Still, there were a lot of people looking through them, and it was first-come first served.

This was my first time buying a fleece. I have processed bits of fleeces before, and I got one for free through Craigslist, but this was different. I knew that I wanted a longwool, or at least a fleece with longish locks, since I have been doing a lot of carding recently, and my combs are getting dusty. I don't really like processing fine wools like merino, because I am afraid that they will felt. I also was leaning toward a conservation breed. I like the idea of helping keep a rare breed alive by buying their products.

After I had looked at and touched a bunch of fleeces, with my handy Field Guide to Fleece providing insights, it was down to two fleeces (or none. I still hadn't committed to getting any at all). I asked a volunteer to unroll a perendale fleece for me. He took it to a table and helped me test some locks for soundness. It was remarkably free of grass and other VM, and the locks were sound and quite long. The only problem was that it was pretty greasy, and yellowish.

Perendale fleece from Lucky Lane Farm, rolled out
Well, long story short, I bought it. I'm hoping the yellow is just the lanolin mixed with dirt, but we will have to wait until it is washed. Early experiments look promising. I have separated out the finer back wool to process separately, but scouring will have to wait a few weeks.
Unwashed perendale lock.
Picking out the fleece took us over an hour. We spent most of the rest of the time looking at yarn and roving among the many many many vendors at the festival. As usual, I bought too much, although I don't think there were any really bad purchases. 
Cheviot sunset gradient roving - so pretty, I couldn't resist.
I have been noticing two trends, however. A much larger percentage of the yarn for sale has silk blended into it. I like the feel of it, but it is too expensive for the kind of knitting I do. It does make it a lot easier to avoid buying too much yarn. The other trend I've noticed it that there is more roving and raw wool for sale in the booths. Now, maybe I am just noticing it more, but maybe handspinning is catching on?

We also spent a bit of time looking at the skein and garment competitions. They were... incredible. 

There are so many pictures I could show. But I'll let this one speak for the rest.
Although we were there for most of the day, there were parts we didn't go to this year: the craft demonstrations, the sheep-shearing, the sheep demonstrations, and the fiber animal barns. I did get one really cute animal picture though, from one of the booths:
Yes, it's a rabbit and not a pile of fluff. If you are having trouble seeing the rabbit, the pink is the inside of the ear.
Whelp, I'm tuckered out after a long day. Good night to you all!
good night

Sunday, April 30, 2017

Injured

Unfortunately, there will be even less progress on my projects to report than usual: I've managed to injure my shoulder, and I'm resting it from knitting and spinning for 2 weeks.

First off, I don't know how I injured my shoulder. But my spindling form couldn't have helped. I have been trying to avoid lifting my elbow above my shoulder and stick to "butterflying" the singles: winding them onto my thumb and forefinger by twisting my wrist back and forth. But oftentimes I am lazy. I think, "it's only a few inches," or "I should give the spindle another spin," and I just lift it up. There's a good chance that this is what is causing the pain and immobility in my shoulder. But if not, it could, so I really do need to work on my form.

So, despite wanting to finish my shawl, and having a lot of free time on my commute, I'm stuck longingly staring at pictures of homemade yarn. If you spin, I hope that my mistakes can help you to avoid them. And this update will be a bunch of small things that I haven't gotten around to reporting yet.

First, some purchases:
Rainbow masham wool braids from Edgewood Garden Studio
I was just too tempted not to buy these rainbow mini-braids from Edgewood Garden Studio. Each is two ounces, and they are perfect for playing around with different ways of doing color combinations. The wool is masham, which is an interesting cross-breed of teeswater and swaledale. The wool is not as soft as many, but it seems to have a lot of luster. Unfortunately, when the braids arrived, they were very compacted (probably from the dyeing process), and I am worried that they will be difficult to spin. They might just need a little predrafting, or they might need a lot of predrafting. Either way, it's not ideal.

My second purchase was a swift.
Peg swift
I have already tried it out, and it makes balling yarn soooooo much easier. No more tiring myself out moving my arms around the chair or over my head. Storing it is the only problem, since it is a bit bulky.
Yarn swift in action

Along with my purchases, I had been feeling like it had been too long since I had processed any fiber. With one spinning project and one knitting project, I wanted to card something. I can't do it on my commute (needs too much room, too messy, etc) but it is a nice project for evenings and weekends. A chance to get back into the feeling of raw wool.

Ryeland rolags
Before I hurt my shoulder I was making rolags out of the ryeland wool I bought at the Maryland Alpaca Festival. It cards wonderfully, and it has a nice, soft, grayish brown color. Some of the locks are more brown, some are more silver, but I am just mixing them all. I have heard that the wool is incredibly stretchy and springy, and so far that seems to be true. I don't know when I might have a chance to spin it, but I think I will use the wheel to make sock yarn.
One lock of the ryeland wool
This week I have been going a little bit crazy with no spinning or knitting. So I started to organize my fiber stash and realized that I have half a pound of white rambouillet roving. I also have a lot of other white wool, and I'm not particularly fond of the rambouillet, so I decided to try dyeing it.
Rambouillet roving, pre-dyeing
While I have dyed wool before, I always did locks. This time I decided to do the roving in different colors. I spread it out on a tray covered in plastic wrap, then got it very wet. Then I poured dye on top and poked it until it soaked it up - Navy blue, kelly green, and yellow. I then baked it in the oven for an hour. I'm still waiting for it to dry, so I don't know if it felted yet.

Rambouillet roving, dyed

I am really not liking the dyes that I got at the alpaca festival. They are really bright and ugly. Oh well, maybe it will look fine spun up.

Maybe.

Sunday, April 16, 2017

Gradients

I'm not usually up on the latest trends, but I hear that gradient yarns are "in" right now. I've made a couple of gradient yarns recently, but it seems more like a coincidence than anything planned on my part. Or maybe I am just seeing gradient roving and top at the fairs, so I jump on a trend unknowingly.

Anyhow, for those who don't know, a gradient yarn is one that shifts gradually from one color to another (to another?), creating gradual changes. Unlike ordinary variegated yarns, which have generally short repeats of the same few colors, a gradient yarn has either much longer repeats, or no repeats at all.

I am not an expert on dyeing, but I suspect it has a lot to do with how and when the fiber is dyed. Ordinary variegated yarns are dyed in the skein, making the parts that line up the same color, and causing repeats. Gradient yarns are either made up of several mini-skeins that are each dyed with different mixtures of two colors (or going from dark to light of the same color), or they are dyed in the wool and spun as a gradient. Because I have never dyed yarn, I will be talking exclusively about the last process.

First, an old project that I have mentioned before:
Single-ply gradient in the skein
I loved the colors on the luxury top that I bought, so I spun it up for a shawl.
Silk-BFL blend, gradient braid
As you can see, the fiber was dyed by painting it various colors in the braid (it's not actually a braid - there is only one strand). This creates a continuous movement of color from one to the next. Moreover, if there are any strong divisions, the process of spinning will generally muddy it, as fiber is drafted from both colors for a little while.

As a spinner, there are a few different ways to maintain that gradient. The first, and easiest, is to keep the strand as a single, which is what I did with this project.
Wingspan Shawl, using single-ply gradient yarn
However, if you want to do a multi-ply yarn, you have a problem. If you do the regular thing and spin from one end to the other of the braid over two or three bobbins, then ply them together, you will mix the colors, getting a barber-pole effect. Not necessarily bad, but often not what you are looking for.
Not from a gradient, but the result of a mixed-color batt plied in the regular way
You can (though I haven't tried it), split your braid of roving or top lengthwise, then spin it separately. If the singles are not exactly even, there will be some barber-poling at the edges of the colors, but it should look like a continuous gradient. Unfortunately, this technique requires planning ahead, which I almost never do.

The third way to do it is to Navajo-Ply. This technique involves making a loose crochet chain stitch with the single and spinning it to get a three-ply yarn that preserves the colors of the singles. The main drawback is that if you have uneven singles, Navajo-plying will tend to enhance them, rather than balance them out like regular plying. This is the technique that I used on my most recently finished spinning project.

For this project, I used roving from The Yarn Mission which I mentioned in another post.
Braided Roving
You can tell that this was dyed before it was braided, and the colors repeat a bit. The roving was probably laid in a zig-zag-like way and painted.

The fun thing about spinning roving like this is that you can see the gradient emerging on your bobbin, but you know that you won't see the entire color progression stretched out until you knit it (or if you make a yarn cake. But I don't have the equipment or the desire for that). I took some pictures as it appeared over time, but this doesn't really do it justice.


I quite enjoy Navajo-Plying, and it goes pretty fast. My 110 grams of fiber made 140 yards of aran to bulky-weight yarn. I haven't yet knit anything, but I am thinking a scarf for my husband. You know I will be sure to post pictures whenever it gets made.

N-Plyed skein on the niddy-noddy
Another view of the finished skein

Sunday, March 26, 2017

Sheep to Shawl: Part VI

Part I covered washing the fleece, Part II covered prepping it, Part III covered spinning singles, and Part IV covered plying and finishing yarn. Part V covered starting to knit the shawl. There have also been two other progress reports on the shawl here and here.

The end of this project is firmly in sight now.
Current state of the shawl as of late March, with final ball of yarn above.
The plan is for the shawl to be as wide as my arms outstretched, so I have a bit more to go. I will finish off that last ball of yarn, and that should be it - I also don't plan on blocking it too much, because I like the texture. If I knit for my entire commute, I can do 5 to 6 rows (120 stitches each) a day, and each repeat of the pattern is 32 rows. There are already 11.5 repeats finished. So, if I don't get roped into doing another project, it should be finished in a few months.

I have also been working on some of the detail work. This shawl is actually a Jewish prayer shawl (tallit or tallis; pl. tallitot or tallesim). Although there are no real requirements beyond being wearable and having 4 corners to attach special fringes to, tallitot traditionally have a neck band so that a) you know which side is the front, and b) it doesn't fray as easily. 

Often these neck bands (atarah; pl. atarot) have Hebrew writing on them. The prayer you say when putting it on is a very common one - it's right there so you don't forget! But I wanted to do something a bit different. Of course, usually the writing is done with weaving or embroidery, but since I don't do those crafts, I was stuck with stranded knitting. Much slower.

I started out by creating a chart of the writing. I found a font I liked from a needlepoint site and copied the letters into my charting program. The nice thing about using the program (over graph paper) is that it will automatically resize to account for the fact that knitting stitches aren't square. The finished pattern looked like this:


The pattern (with a few mistakes)
It says "bring us in peace from the four corners of the earth," which is the phrase that you say in the morning service right before you gather the four corners of the shawl together in your hand. I did have to do some adjusting on the fly when I noticed some mistakes as I was knitting: two of the letters were out of line with the others, and the automatic resizing made some choices that I wouldn't have. 

I knit the band with blue letters on white, using the flicked, hand-dyed yarn that I have mentioned before, and the first mini-skein that I made for the shawl project (it is a bit rougher, so will have a bit of a different texture than the rest of the shawl). I also increased at each edge, to make a slanted corner, as well as put in a line of blue at the top and bottom. 

There was also another major change on the fly - I finished the bottom row of text and realized that it was plenty wide for a neck band. So I cast off. Now it just says "from the four corners of the earth," which I think is just fine. It gives it a "we're all in it together" vibe, I think.

Well, enough stalling, here's the final product:
Neck band, pre-blocking
Well, that's how it looked before blocking. Because it will be ultimately sewed onto the shawl, I wasn't too concerned with curling. And, since it was knit tightly with small needles (2.75 mm wide), it curls a lot. 

Here's a picture of it getting blocked:
Much better
 Because it is pinned to a white towel, you can really see how off-white the wool is. You can also see that the edges continue to curl a bit, but I am sure that it will go away when I sew it on. I think it came out pretty great, though maybe a variegated blue wasn't the best choice. One more picture to show the edge:
Neck band, sloping edge

Tuesday, March 14, 2017

Knerd Knitting

Ok, I'll admit it: I'm a nerd. My whole family is nerds. And not in the way that has come to include everything from music enthusiasts to old movie buffs to knitters. Those are geeks. We are nerds. Although you can be both, I'm not sure that I qualify as a geek.

My parents met doing a play together at a Science Fiction Convention. I grew up reading as much fantasy and science fiction books as I could get my hands on. My brother has a collection of Magic the Gathering cards that numbers in the thousands. And my husband spends his spare time making Pathfinder RPG characters for kicks and playing tabletop RPGs over the Internet (although that is a bit of a contradiction, I don't know a better way to describe it).

Now, obviously, I am also a devoted knitter. So it is always a pleasure to combine my knitting with my nerdy heritage.

Sometimes, this involves items to help with nerdy activities, and sometimes they are regular items that are decorated in nerdy ways. For the first type, I made a pair of dice bags a few years ago, mostly knit while doing all-day tabletop RPG marathons.
Two dice bags made in 2011

The basic pattern was extremely simple: make a rolled brim hat with two holes on the brim, then fold the brim over and sew it with a drawstring. (Maybe someday I should write up the pattern) When I made these I had already made a few for my college science fiction club raffle, but I don't have any pictures of those.

The first one in this picture has an intarsia boat on it, and is made out of cotton. I knit this while playing 7th Sea, a pirate themed RPG. Since that game uses exclusively 10-sided dice, that is what I keep in there.

The second one in the picture was made out of mostly wool scrap yarn, and has a duplicate stitch picture of a 20-sided die. It's not the best picture I have ever made, but I was pretty pleased with how it came out, given that I made the pattern myself. That's the bag I keep most of my dice in.
A 20-sided die. You can see the resemblance, at least.

I have also made a few bits of clothing here and there that were decorated in nerdy ways. I have showed you the astronomy hat that I made for my husband, and also I briefly mentioned the Jayne Hat that I made for him, as well.
Jayne Hat
If you didn't know, on the show Firefly (of which my husband is a huge fan), a character named Jayne wore a hat like this for a single episode. It was a bit of joke, because he was such a tough-guy character, but he insisted on wearing this ugly, poorly-designed hat because his mom sent it to him. Anyway, because so few episodes were made, fans tend to focus on the tiniest details, and someone wrote a pattern for it. It made a perfect birthday present. I guess it sort of straddles the line between costume and nerd-themed couture, but my husband wears it all the time.

You may be wondering what brought this topic to mind. Well, although I haven't been writing much, I have been furiously knitting away. One of the projects I finished this past month was a pokemon-themed scarf for my brother.

We used to watch the Pokemon show together growing up, and he played the games and collected the cards (I'm not much of a gamer, though). His girlfriend is also a fan, and her birthday was coming up, so he commissioned a scarf that would be reminiscent of her favorite Pokemon, polywhirl:
Well, I started by making two black and white spirals, adapted from Frankie Brown's Double Ten Stitch blanket. Then I added a blue border. This involved a lot of going back and forth (the "rows" were only 8 stitches, 4 white and 4 black), as well as many short-rows for the corners.

Finishing up the first spiral with a band of blue
The black and the white parts were knitted from random scraps of worsted-weight wool that I have been collecting over the years, mostly for making penguin slipper-socks.

The blue, though, was some of the first yarn I ever got. It is from Columbia-Minerva (a company I don't think even exists anymore) and I got it from my mother. She doesn't knit, but she used to crochet. When I was 8 and started to show an interest in knitting, mom went up into the attic and gave me the blue yarn that she had gotten to make a vest with when she still had time to crochet. I had used most of it over the years, but I finally used up most of the last ball making this scarf. The one problem was that, because it had been sitting wound up in the ball so long under tension, it had snapped in parts, so there was a lot of weaving in ends for this project.

Let that be a lesson: long-term storage should be in the skein, or in a loosely wrapped ball.

After I finished the spirals, I knit a plain old blue garter-stitch scarf (I had a short deadline to finish it) and joined the two sides with kitchener stitch.

Polywhirl scarf. Folded a bit in the middle to make it fit in the photo.
I like how the slightly thicker black and white yarn gave the scarf bulging ends. And it does sort of remind me of polywhirl. I wish I had a picture of the recipient wearing it, but all I have is this shot of it folded up and ready to be sent out:

Scarf folded up and ready to gift

Sunday, February 5, 2017

Craftivism?

I know I have not been updating this blog as much as I should, and I apologize. I have been having a bit of writer's block: so much is going on in my city, my country. Living in DC, we are really on the edges of the maelstrom: we know so many people who are deeply involved in politics and government, and there is a low-level anxiety to almost every interaction.

Hopefully, my federal job will not be part of the purges (but who knows when statistical agencies might become the enemy), and my husband is a federal contractor (defense is probably a safe industry), but we live in scary times. It is hard to just write about ordinary things.

So I guess I will compromise. I won't talk about ordinary things, I will talk about craftivism.

If you haven't heard the term, craftivism is putting your time and effort into works of art for a cause. A well-known example is the AIDS memorial quilt, which powerfully brought visibility to the AIDS epidemic in the United States.

What is the appeal of craftivism? Most obviously, it is fun - people like crafting, and they like having a reason to craft. But there are other benefits. People spend hours crafting - and hours thinking about the cause, whatever it is. They often come together to craft, and those sewing circles or stitch and bitch sessions can be places to plan and organize political or social movements. There are other benefits to the movements as well - art grabs people's attention, especially coordinated art.

Which brings us to today's most noticeable instance of craftivism: the pussy hat project.
Me and fellow marchers wearing pussy hats on Jan 21. I made the three on the left.
If you hadn't heard of the project, it was an effort to get knitters, crocheters, and sewers from across the country, whether they were going to a Women's March or not, to contribute by making a pink hat for a marcher to wear. Many of the hats had "pussy" ears, in a sideways reference to the President's disparaging remarks. This project demonstrates one of the most powerful parts of craftivism - craftivism can convey a sense of magnitude even beyond the sheer numbers of people marching.
Marchers on Independence Avenue in DC, about 2 pm Jan 21st
Not only are all of these women and men marching for women's rights, but they have a common dress code. The hats are pink, but not just one shade of pink, because most were handmade by a marcher or a friend. The hours of crafting to make hundreds of thousands of unique hats is overwhelming, and sends a powerful message. Pictures taken at any of the US marches are unmistakable, because of the ubiquitous pink hats with cat ears.

Now, this is a crafting blog, so I should talk about the three hats I made.

I saw this as the perfect opportunity to use up that hideous pink yarn that was gifted to me a decade ago. I don't really like flamboyant clothing, so I really had nothing to make with it until now. But marches are for wearing eye-catching things, so the yarn was perfect. Plus, I didn't have much pink yarn, as I'm not usually a fan of the color.

My first hat was made almost entirely with the eyelash yarn, and is pretty eye-catching.
Pussy Hat #1
I held the yarn double, and knitted it in the round. I used a pale pink wool from my stash for the ears (I used intarsia techniques) and finished it off with kitchener stitch: no decreasing required. The yarn was pretty annoying to work with (it was nearly impossible to see what the previous stitch was, or even count my stitches) but I definitely got a lot of attention working with it on my metro commute!

Hats 2 and 3 were more normal. I didn't have much left of the eyelash yarn, so I just used it for a bottom border.
Pussy hats #2 and #3
I used similar techniques for these hats, but smaller needles. I pretty much used up all of my pink yarn, which is why I also used some of the lavender alpaca yarn from North Light Fibers (it actually looks mauve when it isn't contrasted with the pink).

My husband wearing one of my pussy hats at the march
I found making the pussy hats to be more meaningful than I expected. I started with the idea that I would just make one to use up some of my pink yarn. But there was something pretty powerful about knitting for a larger purpose, and I became somewhat addicted to looking at pictures of the hats that others had made. My local yarn shop had knitting circles to make them. It was an important part of the march for me.

As an aside, I also wanted to show off my latest purchase. This is also tangentially related to craftivism though. I follow a group called The Yarn Mission on Twitter, mostly for the pretty pictures of knitwear that they post. But they are a craftivism group for black liberation. I recently bought some fiber from them:

Hand-Dyed roving from The Yarn Mission. Sandy decided that he wanted to be in the picture.
I love that the colors utilize a traditionally African American color palette. The only thing that I am worried about is that it was advertised as good for "spinning and felting". Usually, if it is good for felting, it is not good for spinning. I guess I will see when I spin it up.